How to Get Started with Web Monetization using Chimoney App
Web Monetization is an easy way for creators to earn directly from their audience and for supporters to instantly fund/support the content they love.
Chimoney makes this process simple by providing wallets that are fully compatible with web monetization for receiving and sending payments. In this guide, we’ll take you step-by-step through the process of setting up a Chimoney App account to sending or receiving your first payment either as a supporter or a creator.
Before You Begin
You’ll first need to download the Chimoney App and complete your KYC (Know Your Customer) verification. Get the app from the Play Store (Android) or App Store (iOS). Once it’s installed, you’re ready to follow the steps below:
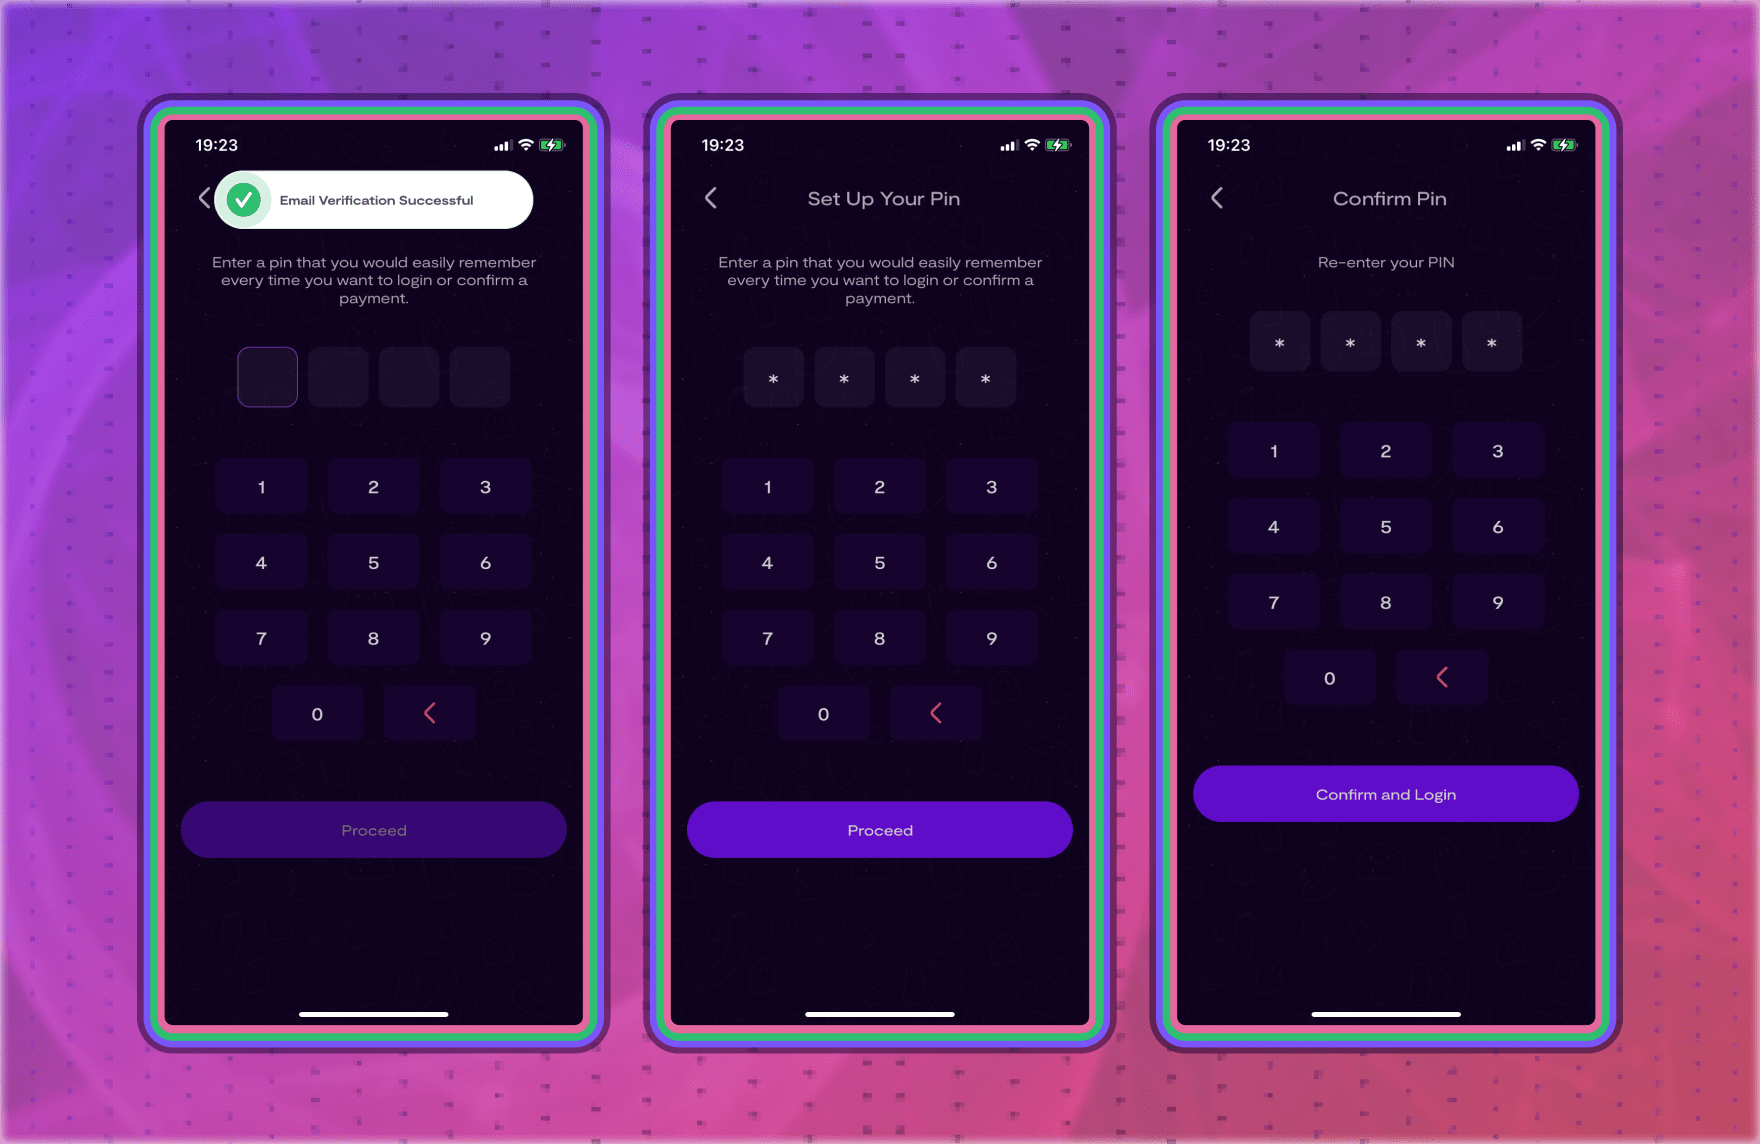
1. Create Your Account
- On the welcome screen, enter your email, username, and a secure password or sign up with Google or Apple.
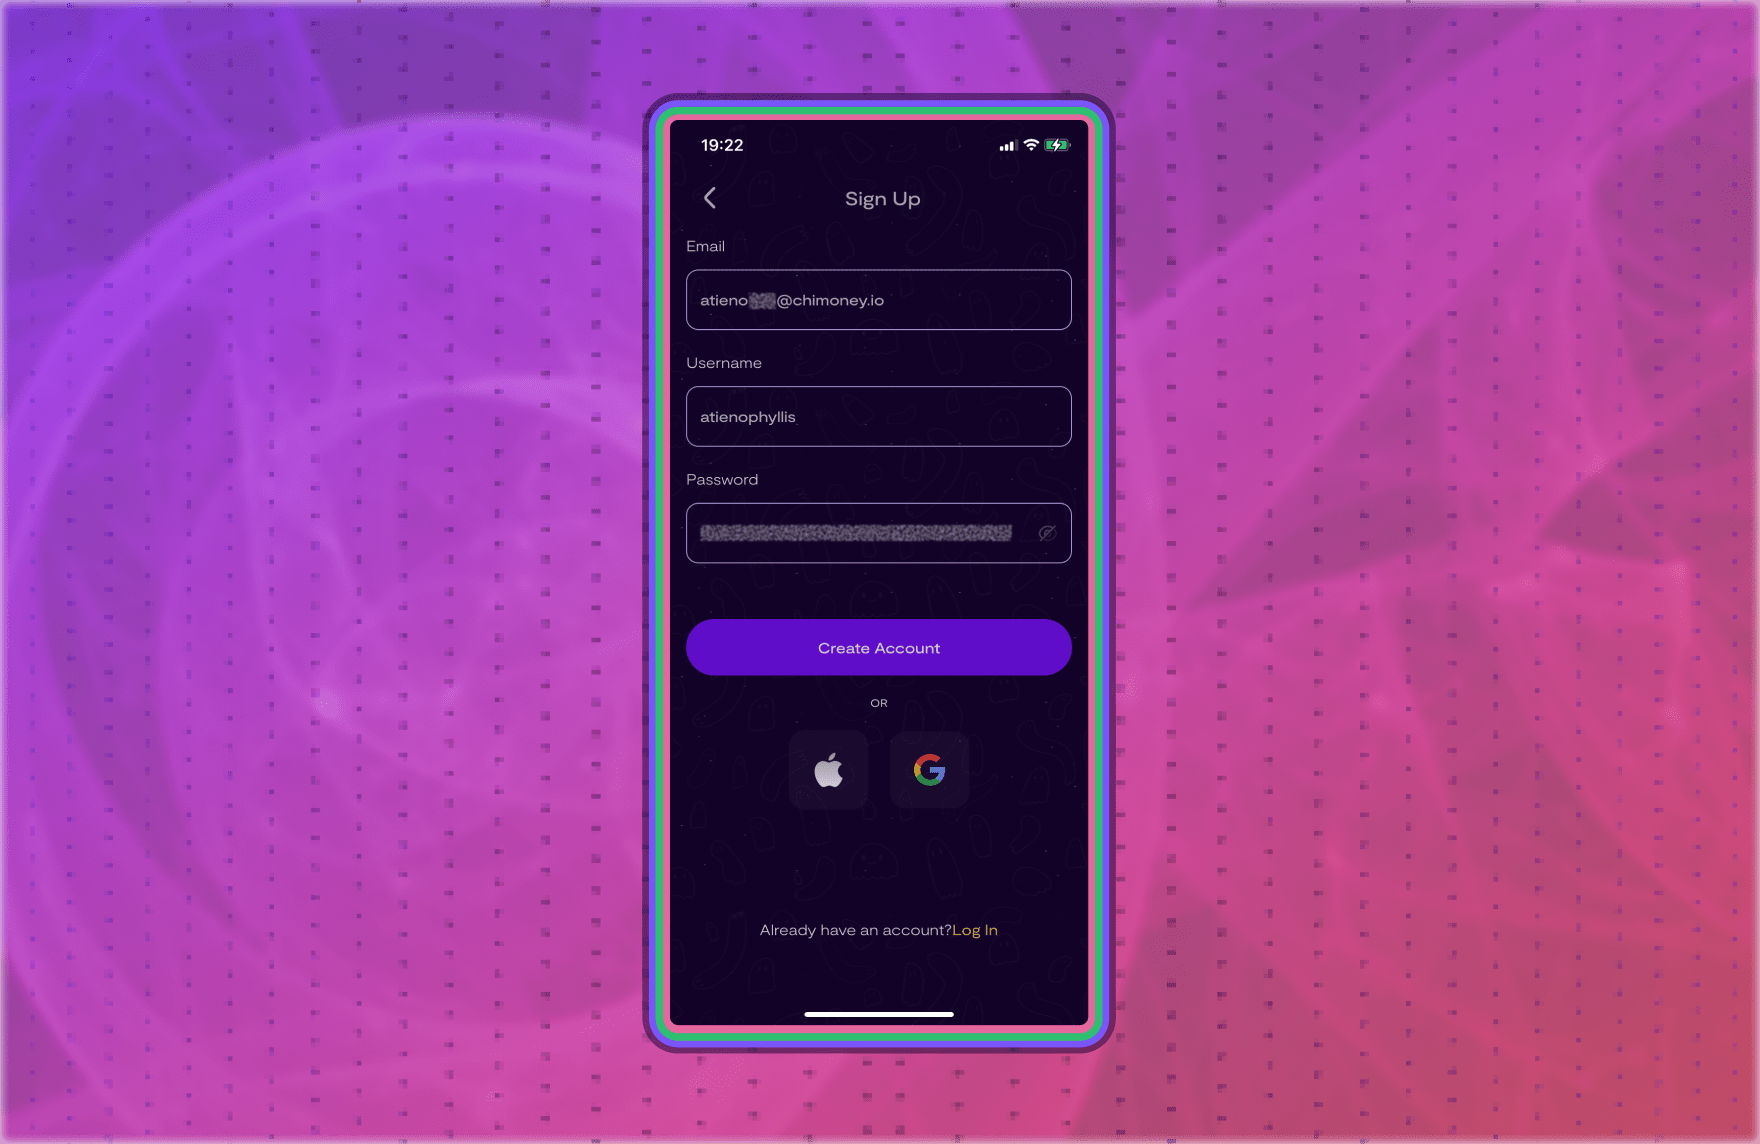
- Check your email for a 6-digit code, then enter it in the app to verify your email.
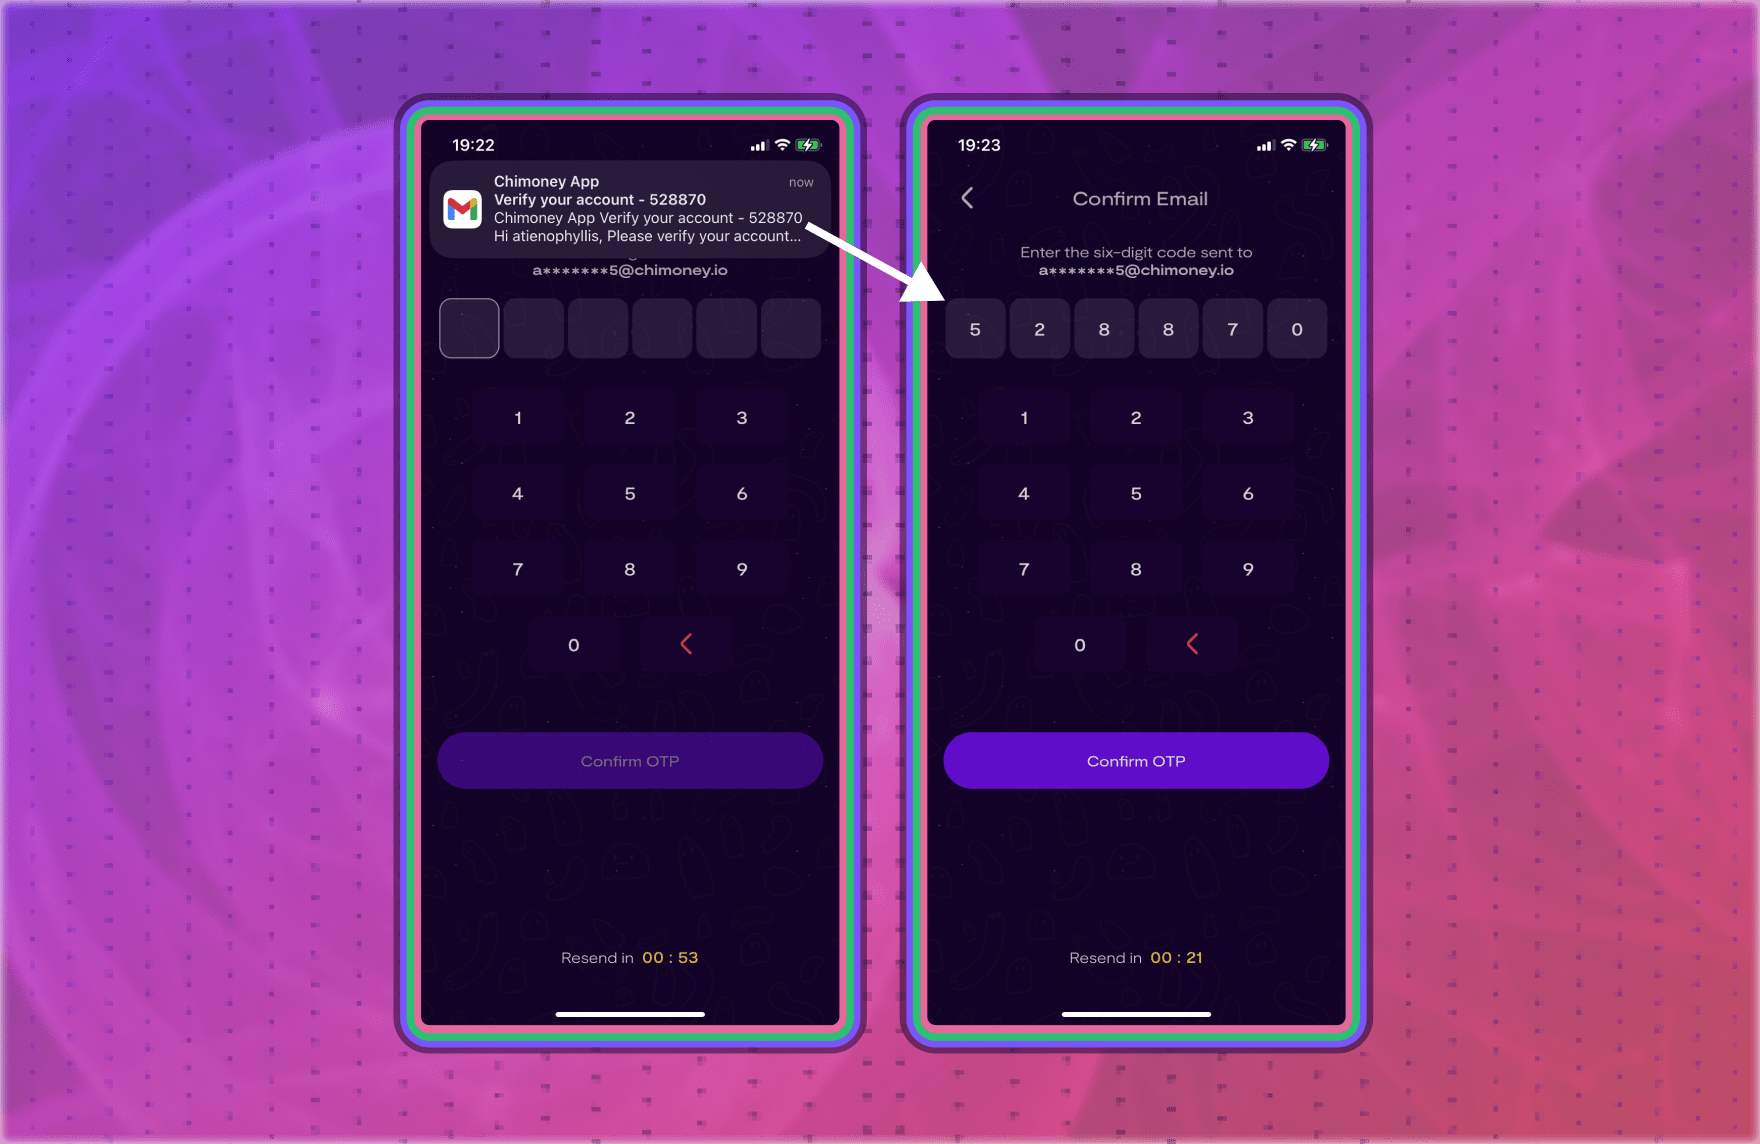
- Set up a 4-digit PIN (used for logging in and approving transactions). Confirm it on the next screen.
2. Claim Referral (Optional)
- If you have a referral code, enter it and tap 'Confirm Referral Code.'
- If you don’t have one, tap 'Skip'. You can complete the KYC process on the next screen.

3. Complete Your KYC
- On the Personal Info screen: Enter your full name, country of residence, and occupation. Then click on 'Next Step.'

- On the Verify Phone screen: Enter your phone number and click on 'Send Code'. You’ll receive a code via WhatsApp. Enter it in the app and tap 'Verify OTP'.

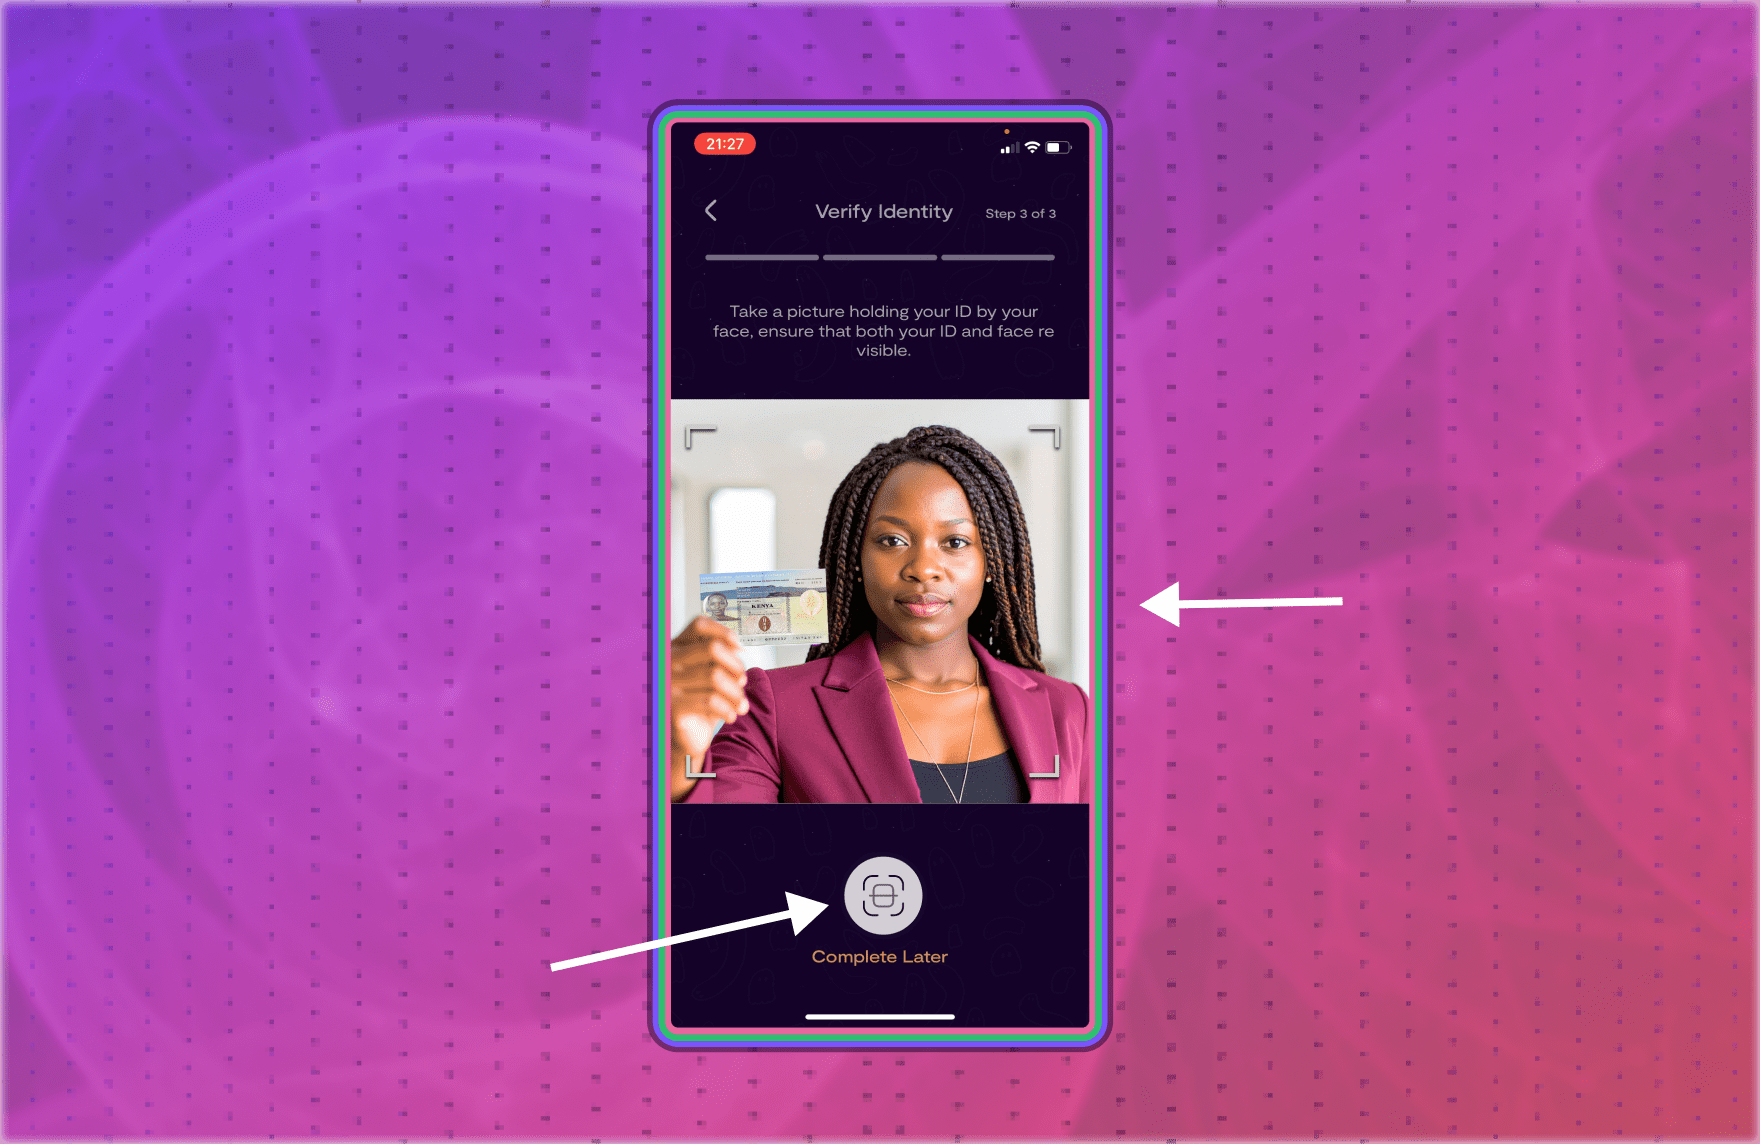
- Finally in the ID Verification screen: Upload a valid government-issued ID (Driver’s License, National ID, Passport, or Voter ID). Then take a clear selfie holding your ID next to your face.

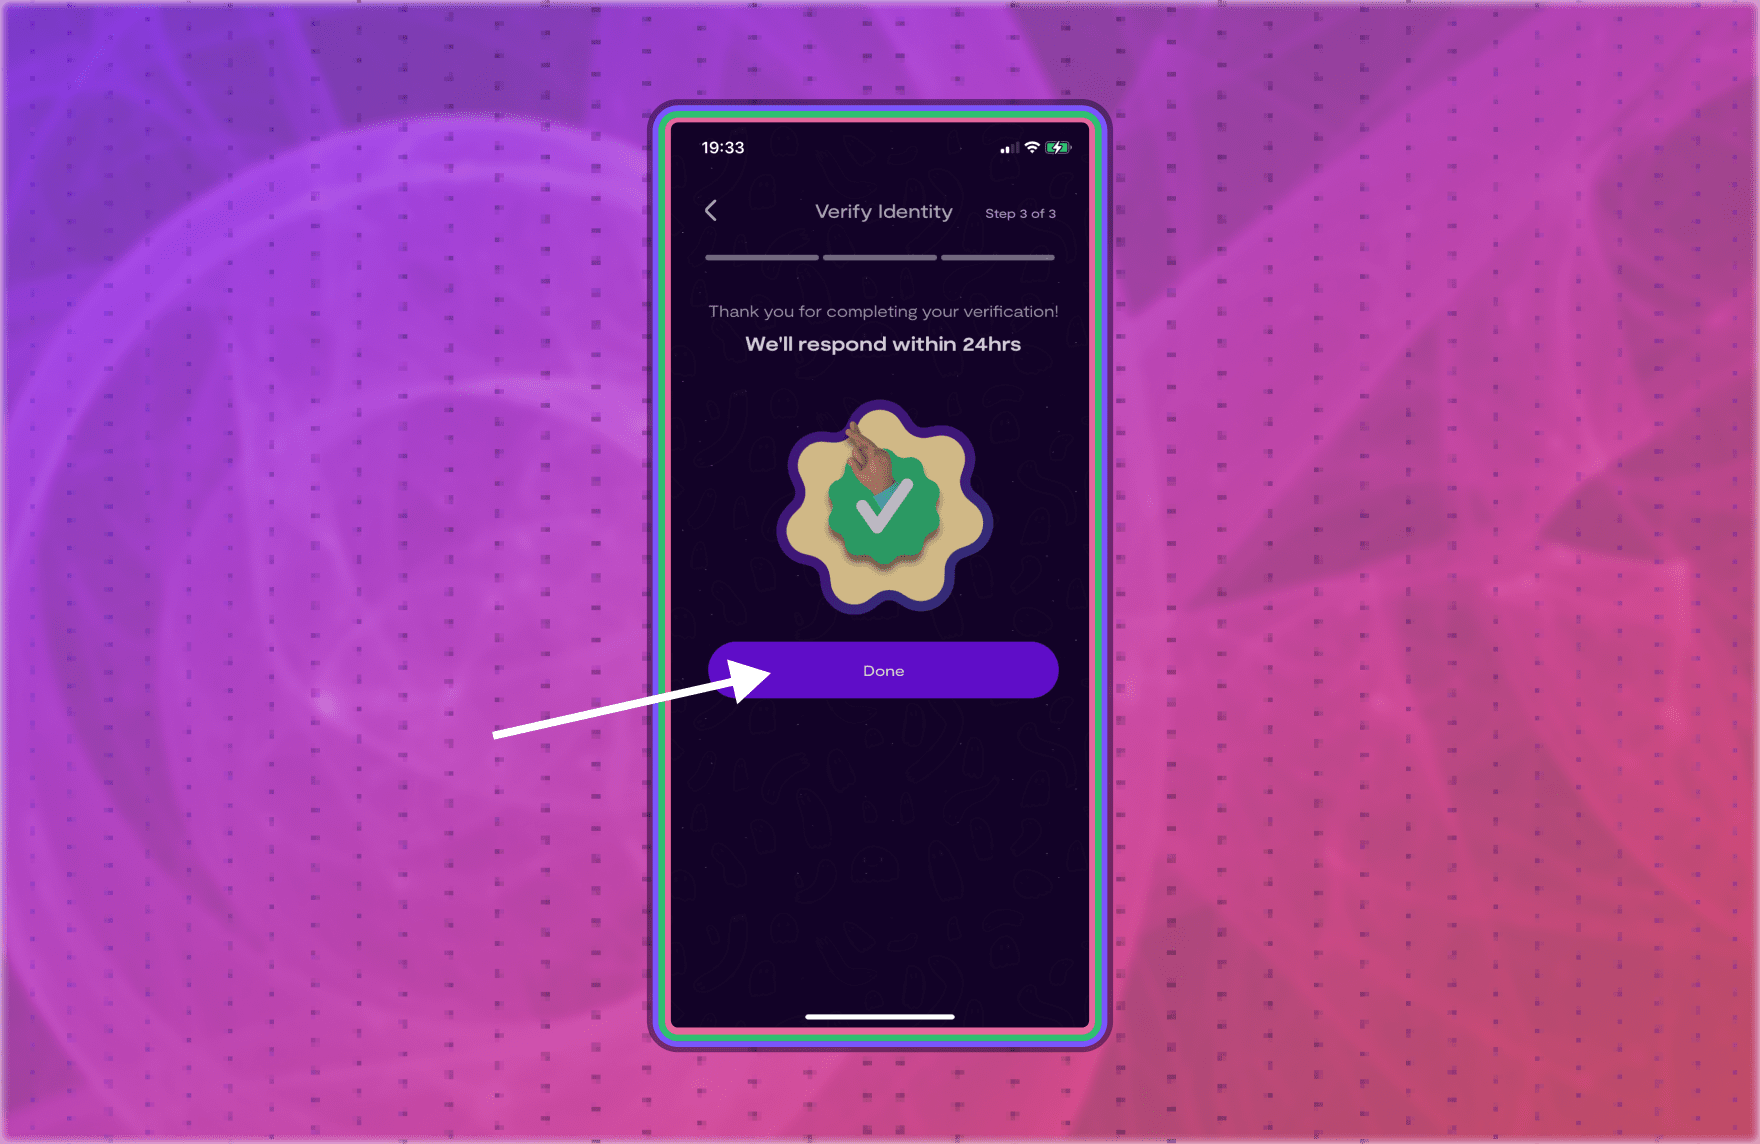
4. Submission & Approval
- After uploading your ID and taking a selfie as directed, you’ll see a confirmation message.
- The Chimoney Compliance team will review your submission within 24 hours.
- You’ll receive an email with feedback on your KYC review decision, including your account’s transaction limits if your verification is app
How to get your wallet Address on the Chimoney App
When your KYC is approved on the Chimoney App, your account is automatically issued an Interledger Wallet Address, navigate to the ‘Account tab’ and click on ‘Interledger Wallet Address’, your wallet address should look like this: https://ilp.chimoney.com/username or https://ilp.chimoney.com/123456
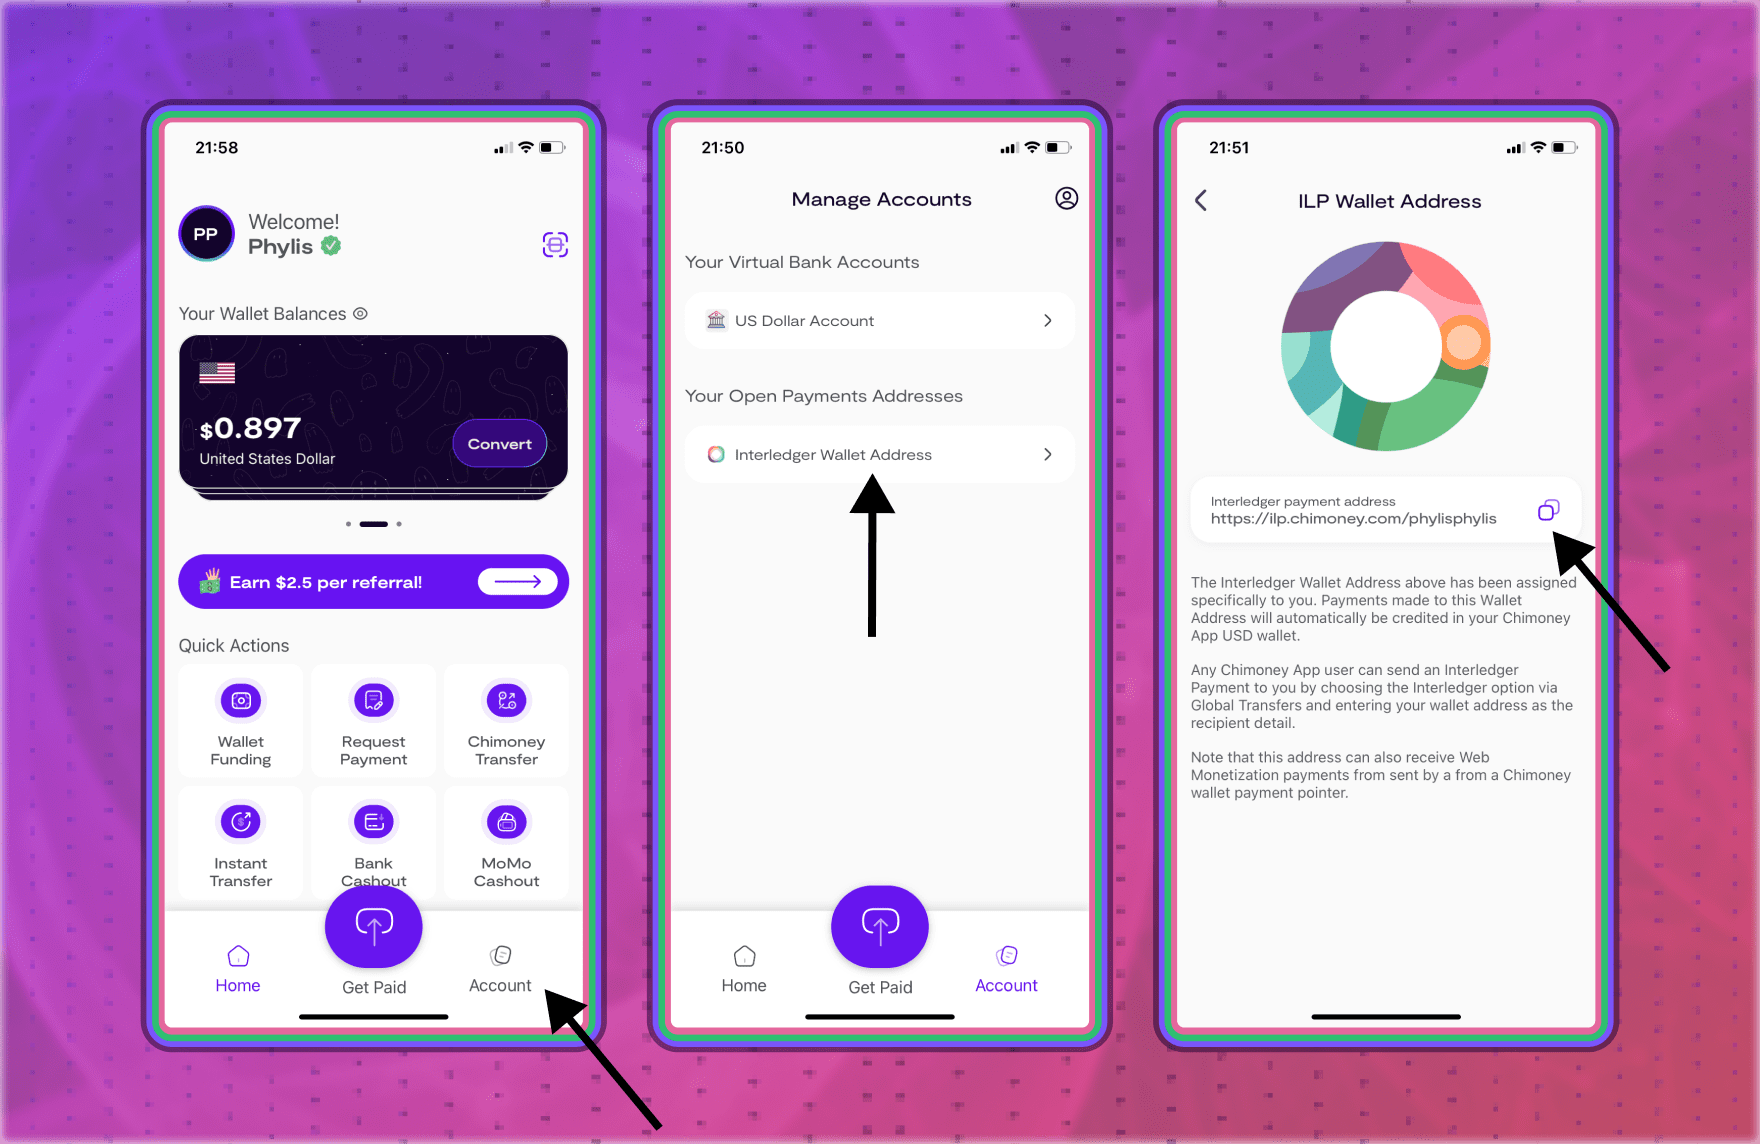
Note: If you’re a supporter, you’ll need this wallet address to connect to the Web Monetization extension. If you’re a creator, this is the wallet address you’ll add to your website so supporters can pay you directly. Kindly copy it for use in the next steps.
Depending on if you’re a supporter or creator, the next steps may be a bit different for you.
- If you’re a supporter, follow the steps under ‘How to get started as a supporter.’
- If you’re a creator, scroll to ‘How to get started as a Creator’ and follow the steps.
How to Get Started as a Supporter
To support/send money to creators here’s what to do:
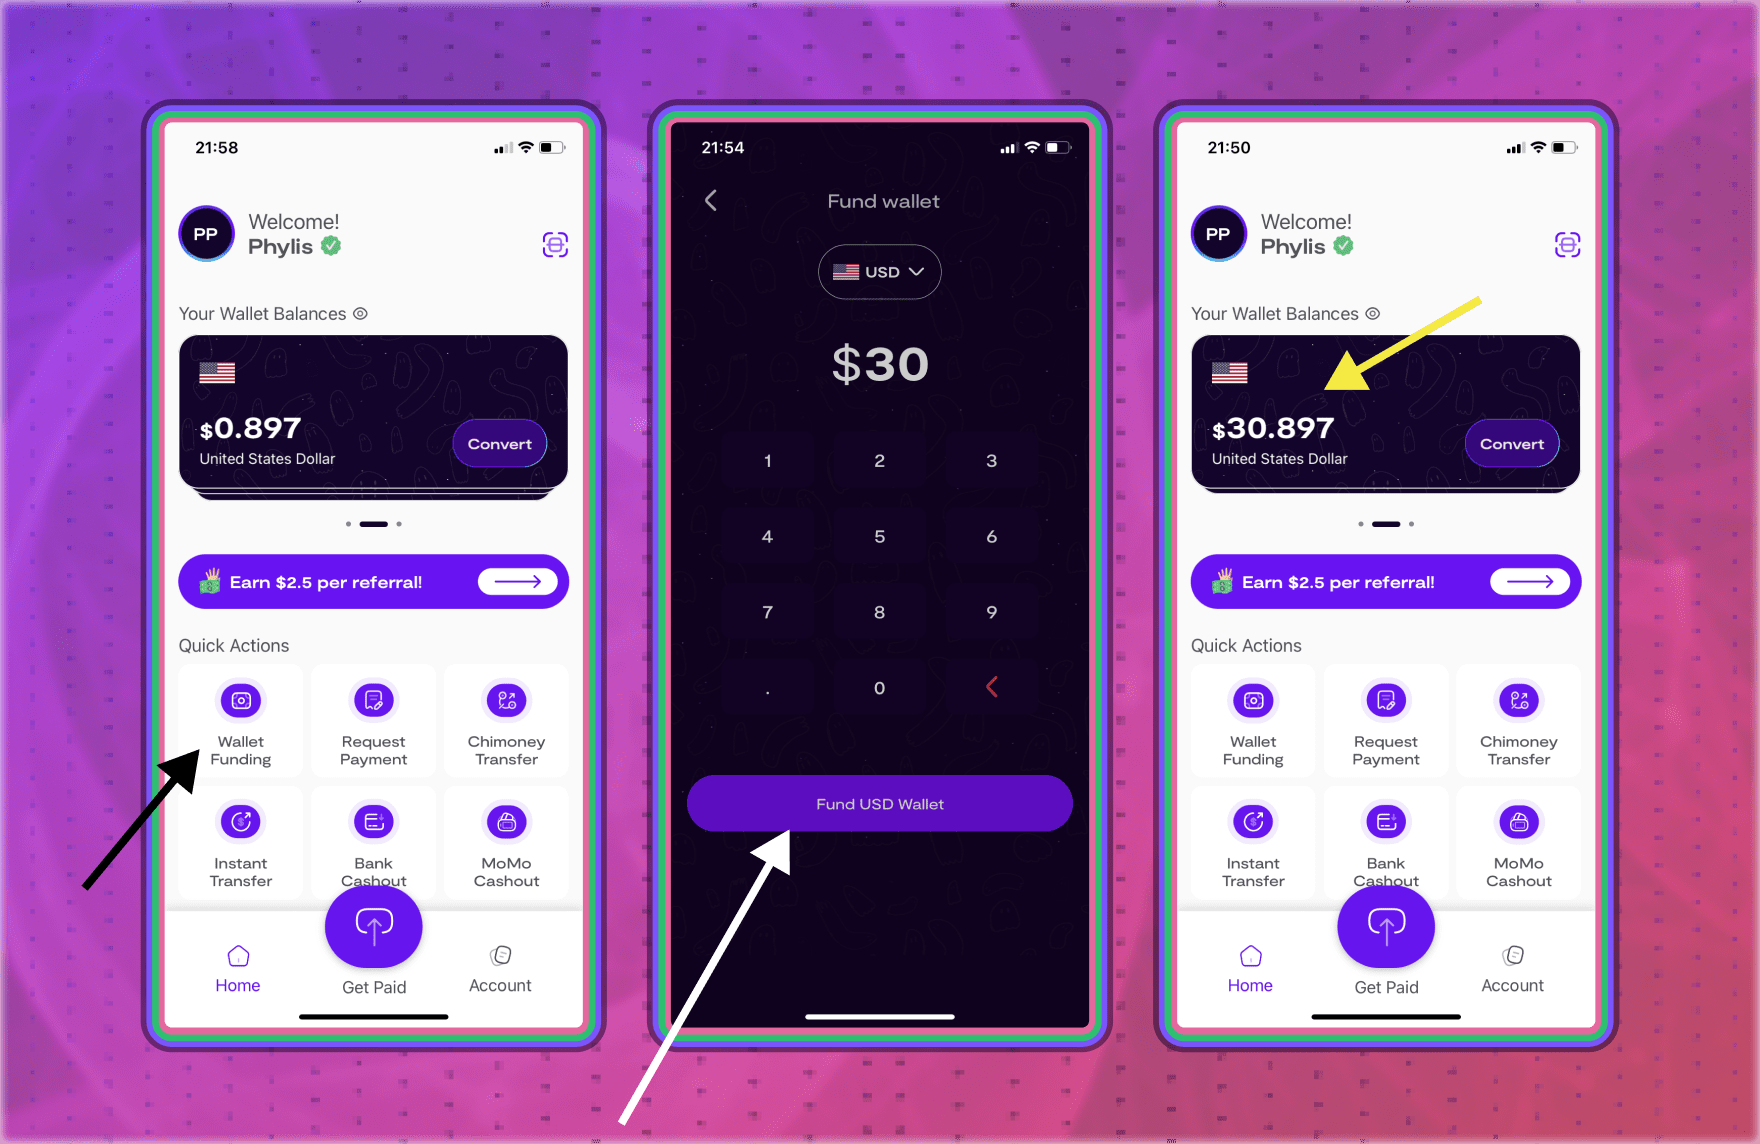
1. Fund Your Wallet
In order to be able to make web monetization payments on the Chimoney App, your USD wallet needs to have a positive balance:
- On the homepage, click on 'Wallet Funding'.
- Enter the amount and select USD as your currency.
- You will be taken to the Chimoney checkout page where you can complete the funding process depending on your preferred payment rail / location.
- Upon successfully completing the payment, your USD wallet balance should be credited with the amount funded.
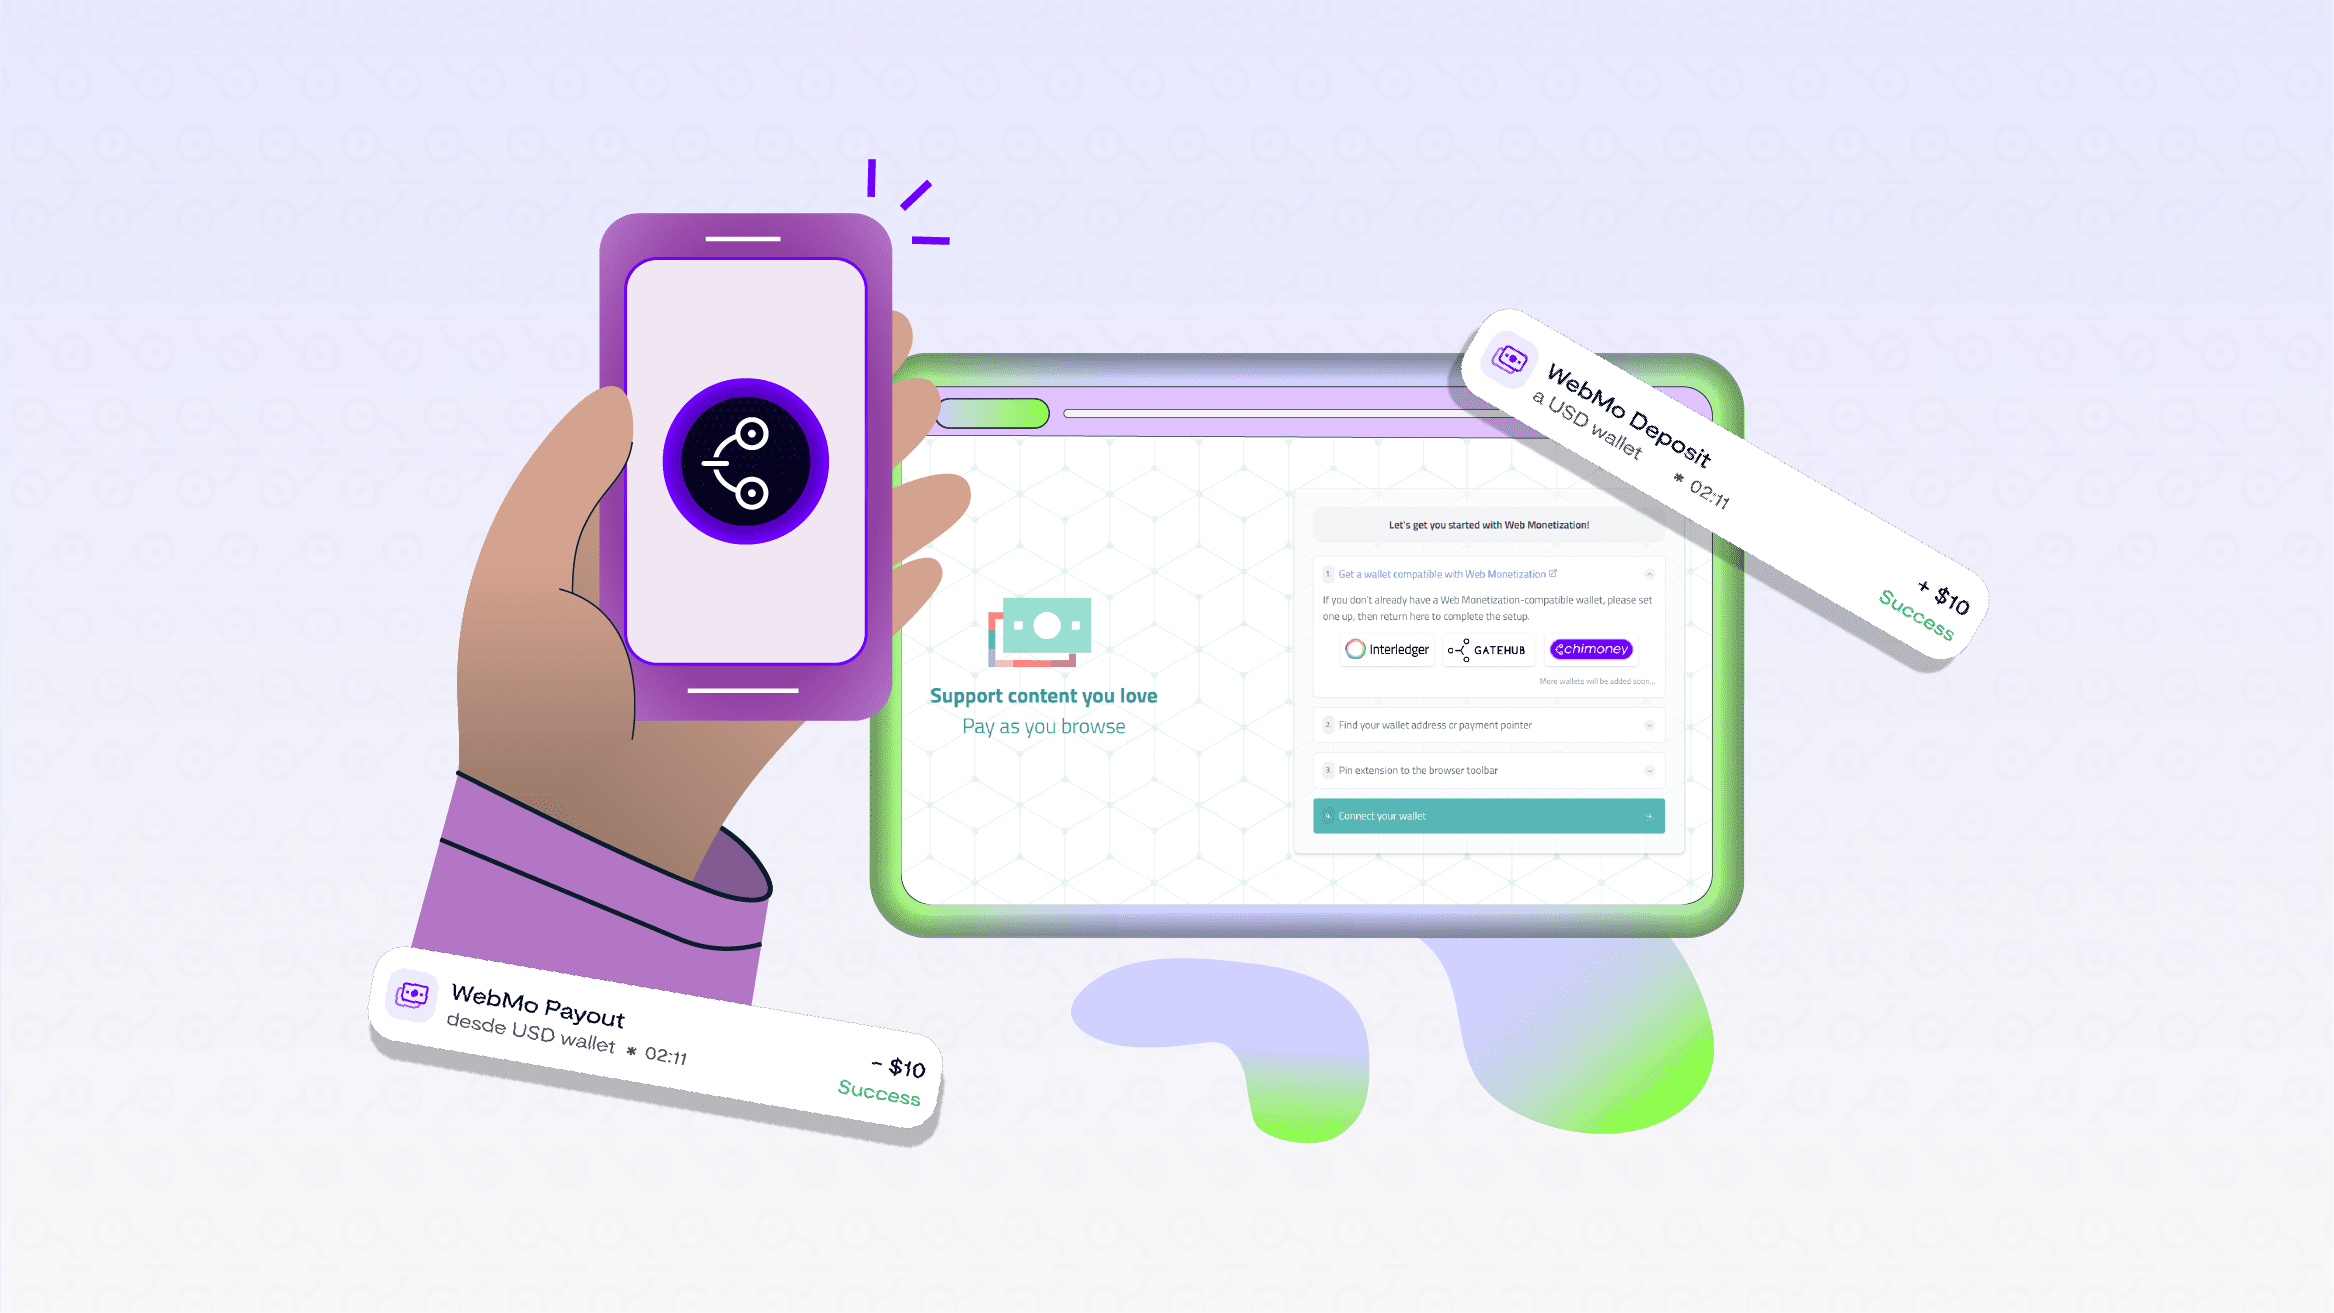
2. Install the Web Monetization Extension
You can Install it from:

3. Connect Your Chimoney App Wallet
- Open the extension, copy and paste your wallet address from the Chimoney App into the extension.

- Set your spending budget, this will be allocated from your Chimoney App USD wallet.
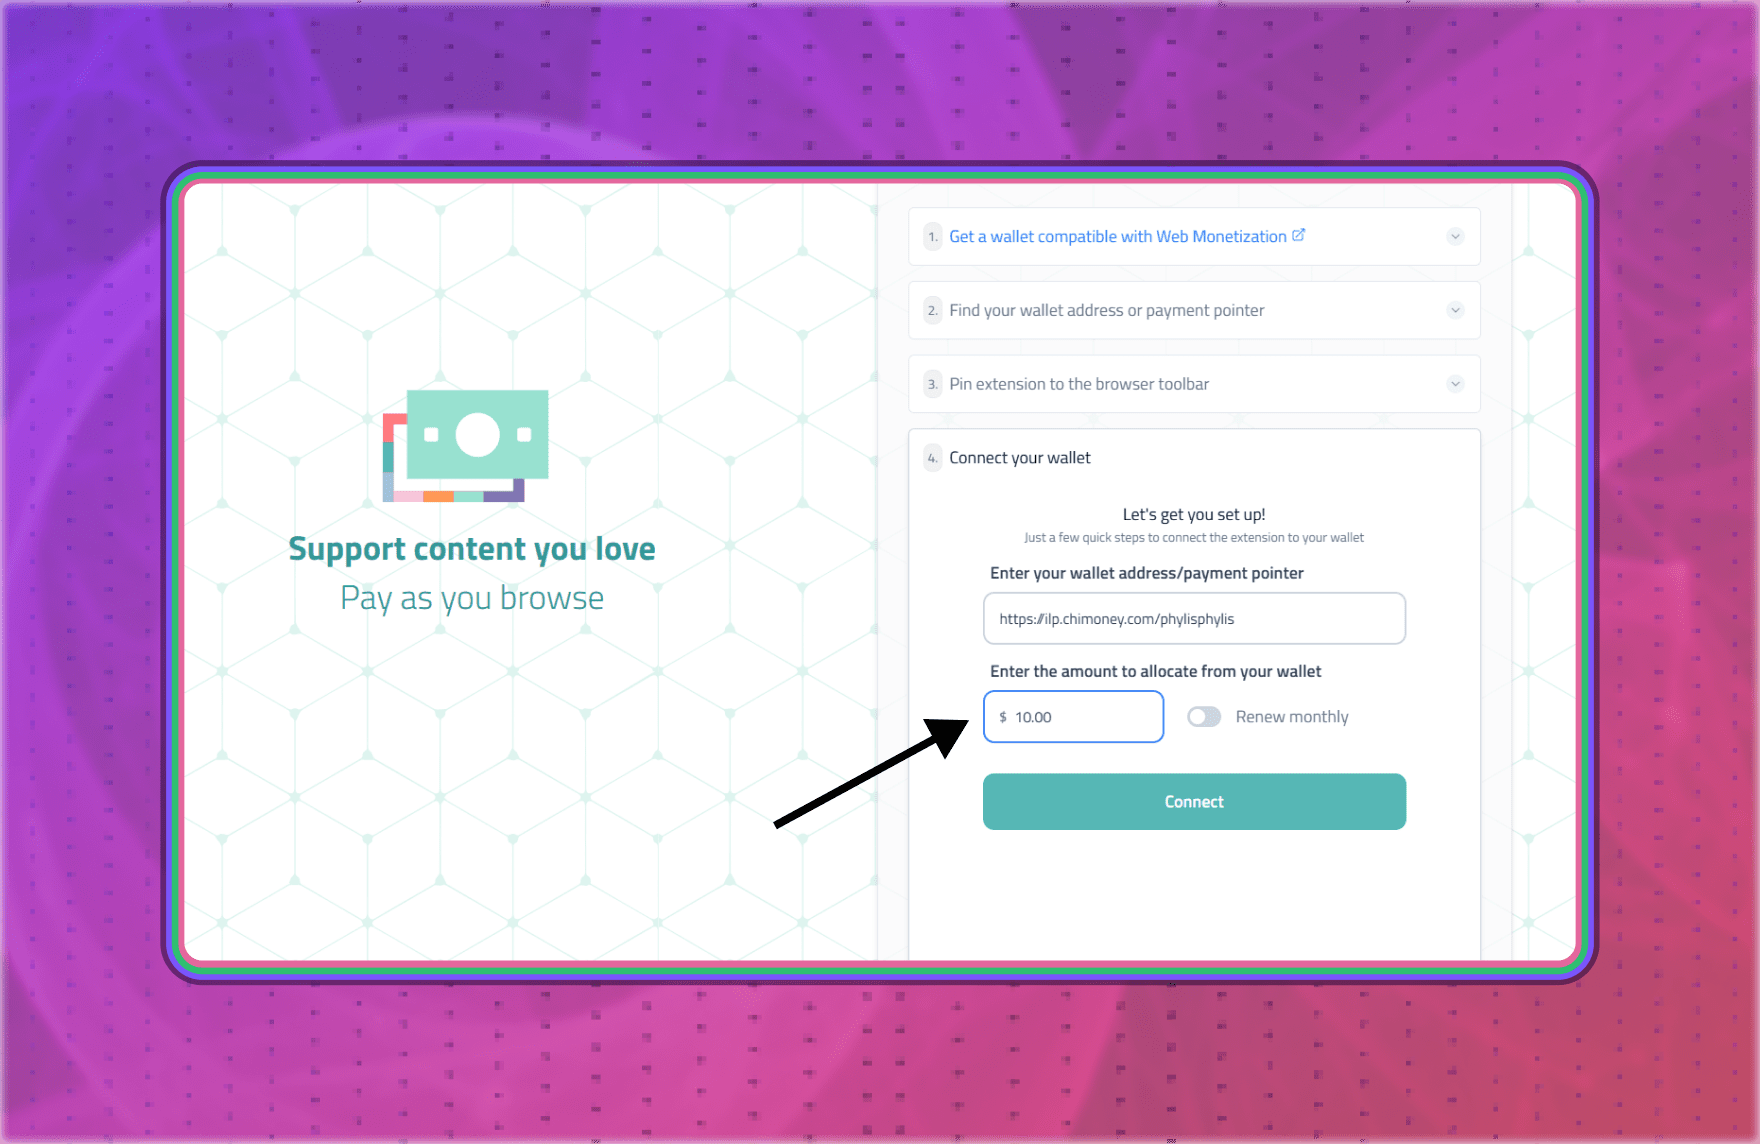
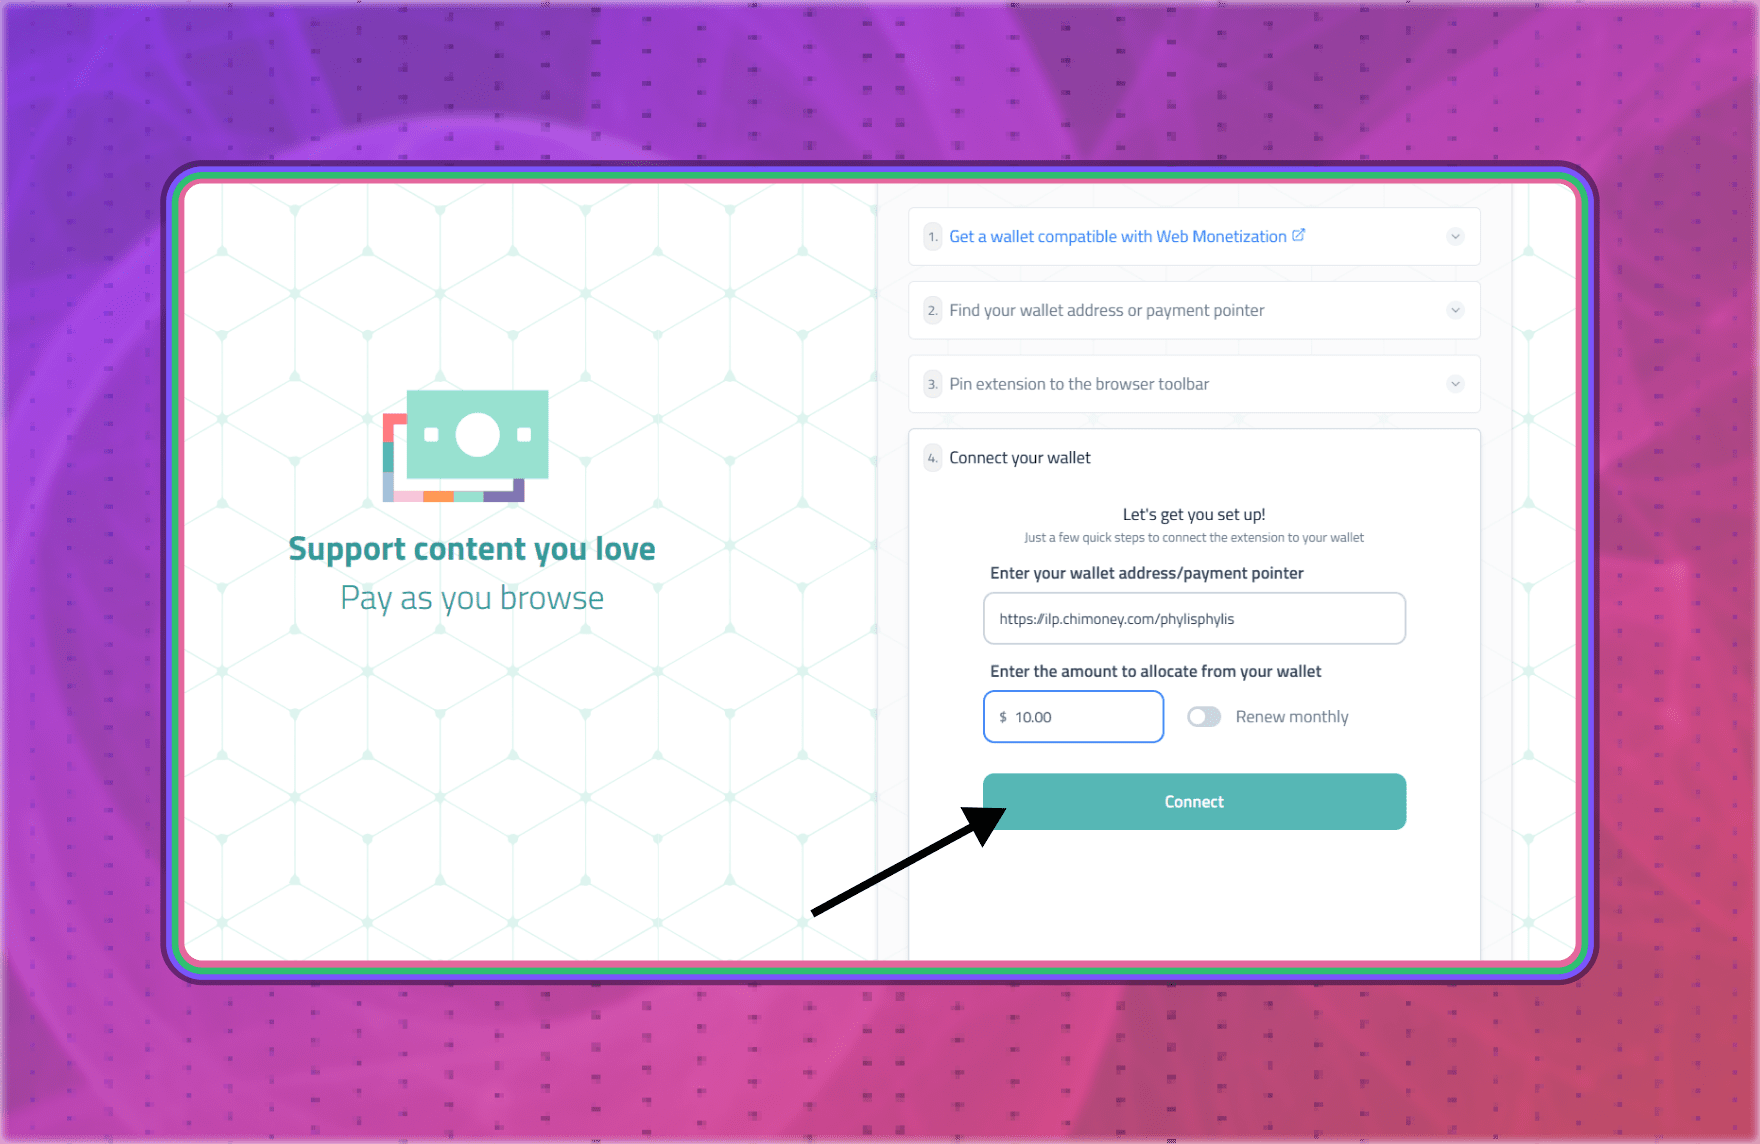
- Click ‘Connect,’ to move to the next step.
- Click agree to enable the extension to initiate the process of adding a secure key to your wallet.
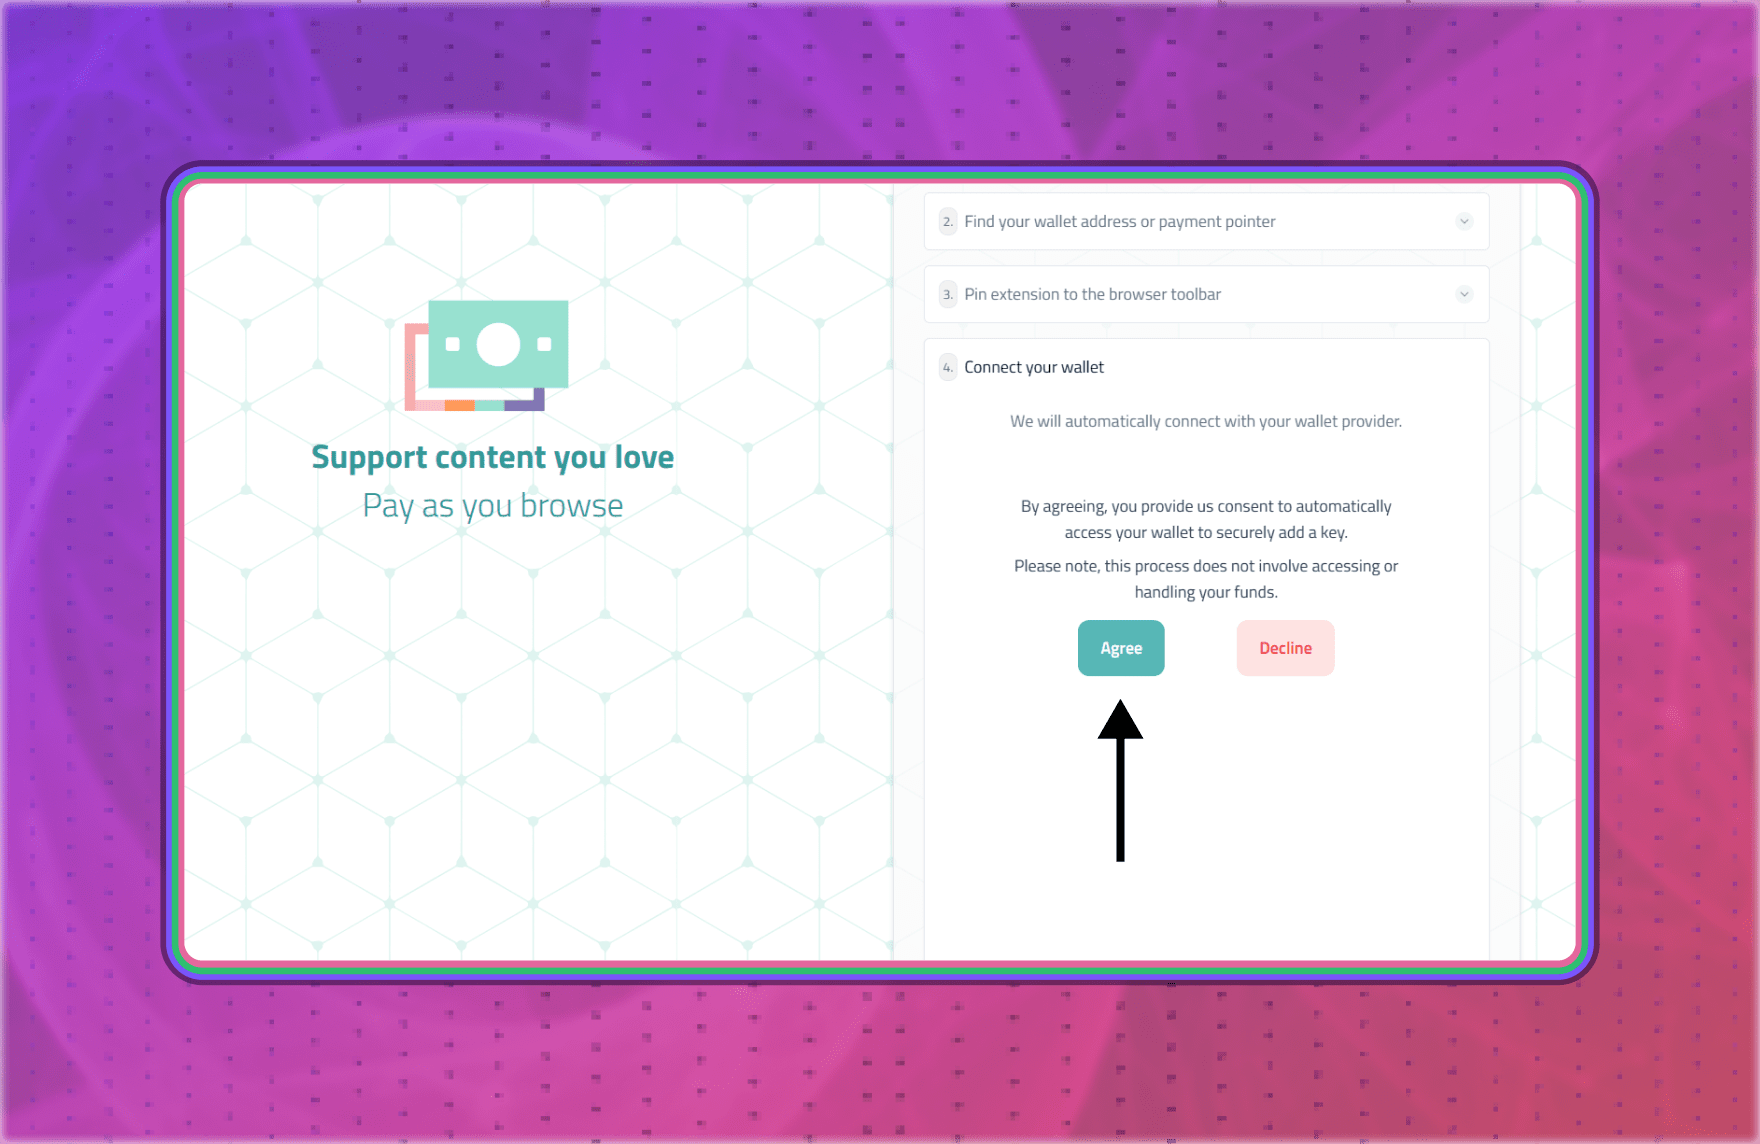
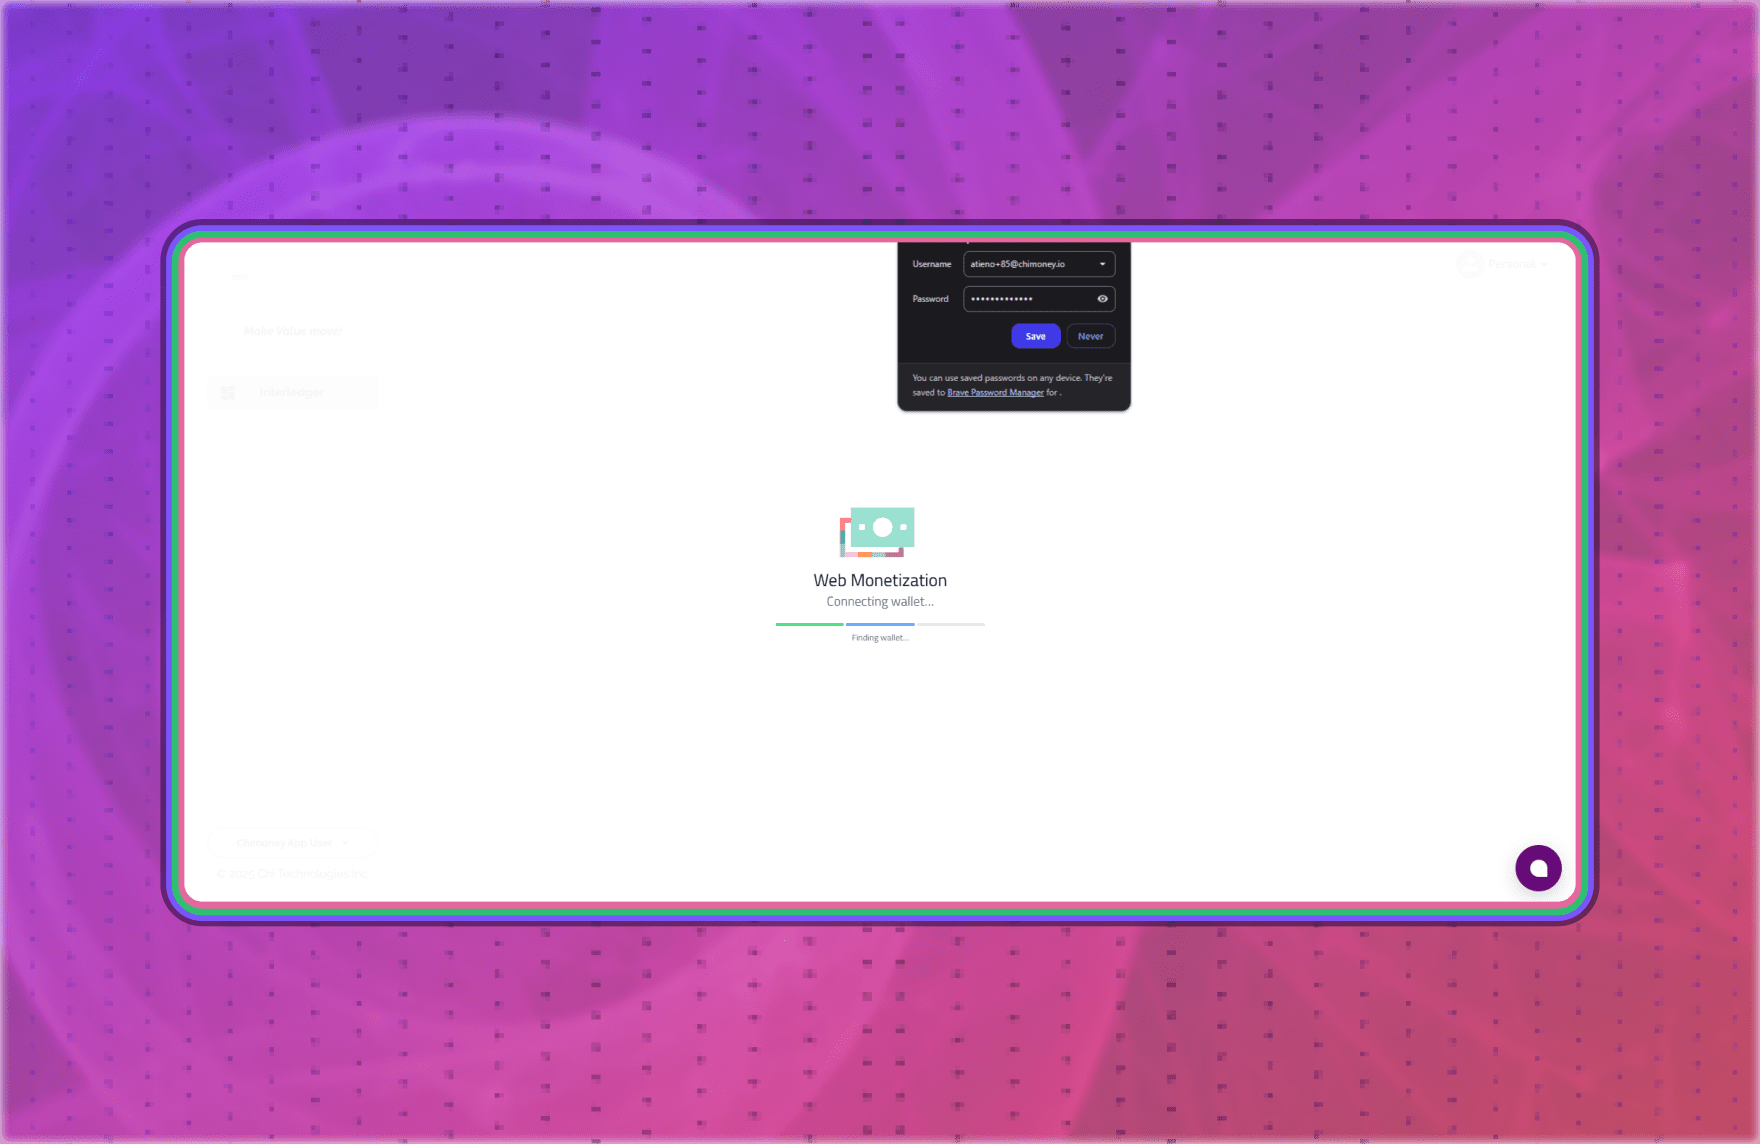
- You will be redirected to the Chimoney App Web Monetization login screen where you can sign in with your Chimoney App email and password on your web browser. Sign in with the same login details or method you use for your Chimoney App account.

4. Authorize wallet access
- You will then be redirected to approve the Web Monetization Extension’s request to access your Chimoney App Wallet.
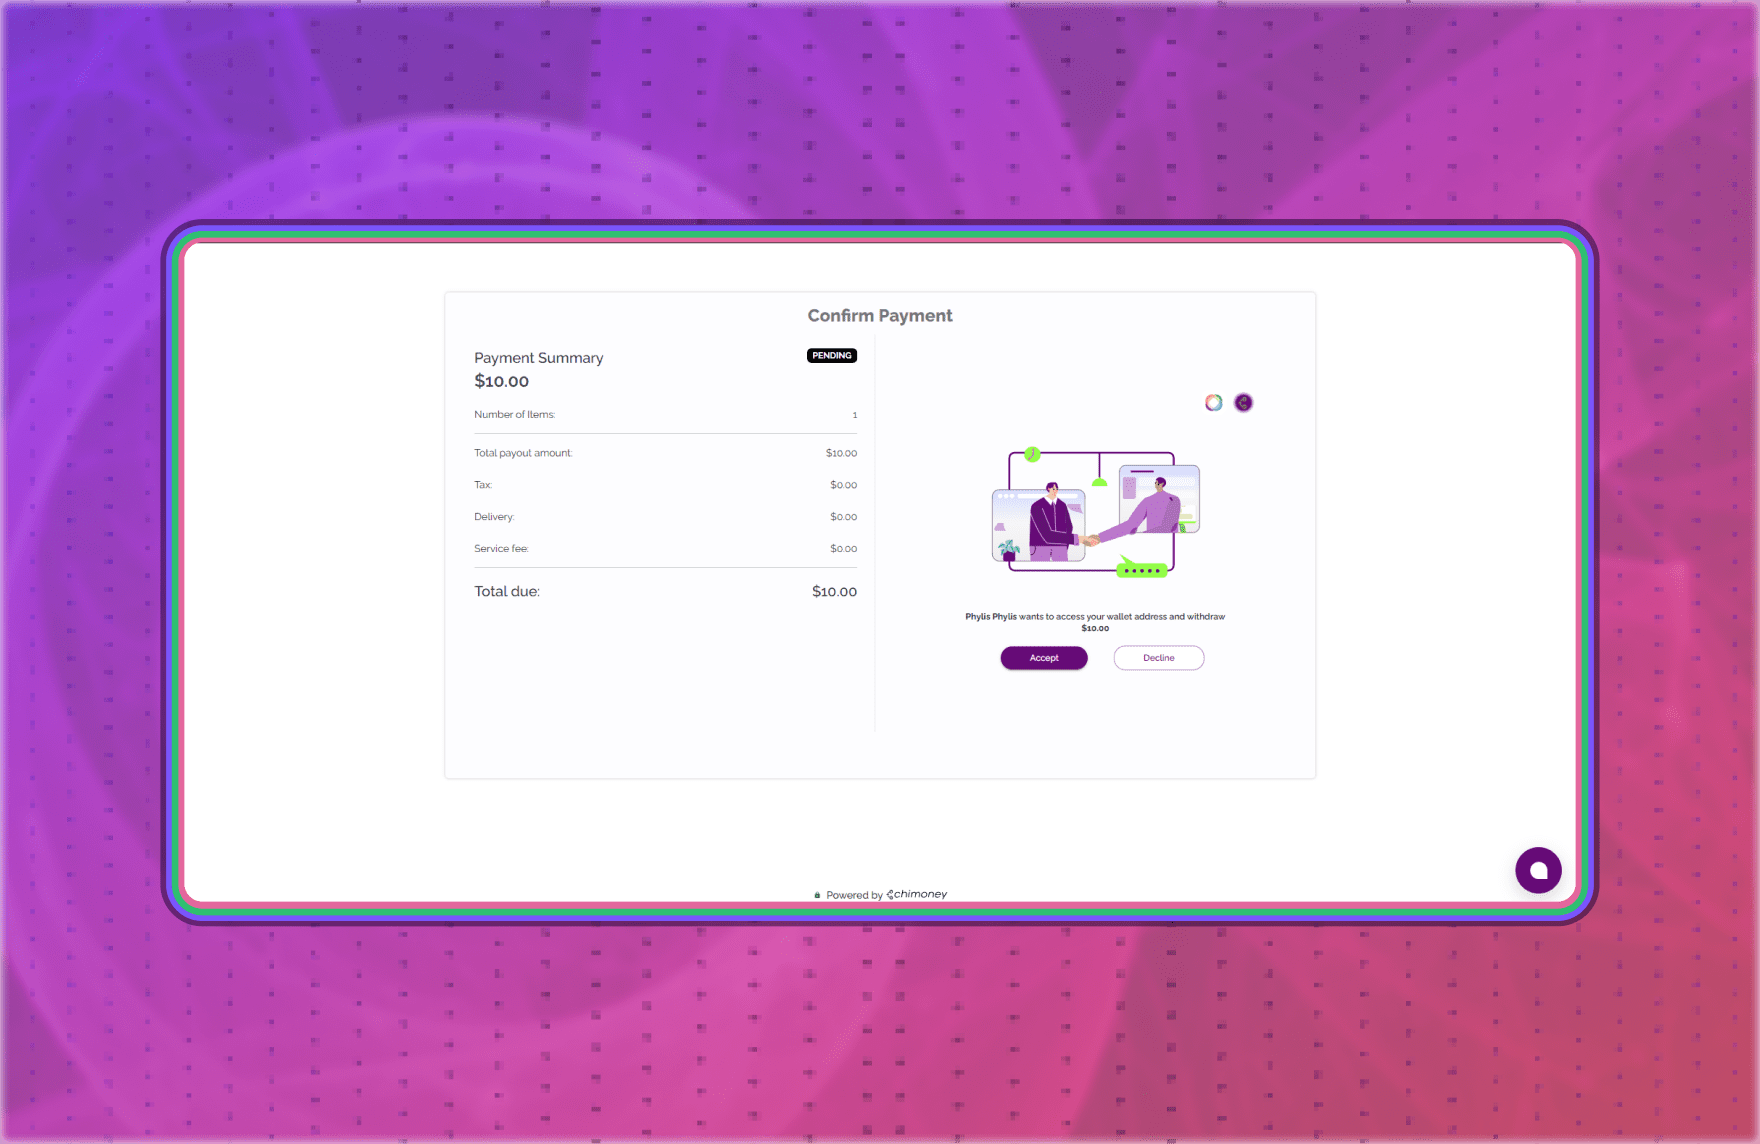
- Click ‘Accept’ and you will be redirected to a page confirming that "Your wallet is now successfully connected to the extension."

That’s it, you’re ready to support creators!
Next, we’ll cover how to get started as a creator. If you’d like to learn how to send a payment as a supporter, you can skip ahead to the ‘How to Support a Creator (Send Money to a Creator)’ section.
How to Get Started as a Creator
To get started as a creator, you need to add your Chimoney App Wallet Address to your Website:
- In your site’s
<head>tag, paste the following HTML code:
<link rel="monetization" href="https://ilp.chimoney.com/yourusername" />
- Replace
https://ilp.chimoney.com/yourusernamewith your correct wallet address copied from the Chimoney App. - Once added, supporters with Web Monetization extension can start sending you payments as they browse your content.
Tip: If you use no-code platforms like Carrd, Ghost, or Wix, look for a Custom Code or Header Code option in the site settings. If you’re unsure, ask your web admin or a developer friend for help.
How to Support a Creator (Send Money to a Creator)
Once your wallet is funded and connected to the Web Monetization extension, you can start sending money to your favorite creators. There are two ways to do this:
1. Continuous Payments
When you visit a Web Monetized site, the extension will automatically begin streaming micro-payments to the creator in real time as long as the page is open and active. The default rate is $0.60 per hour sent as micropayments of $0.01 or $0.02. These payments are being sent because the extension has ‘continuous payments’ toggled on by default.

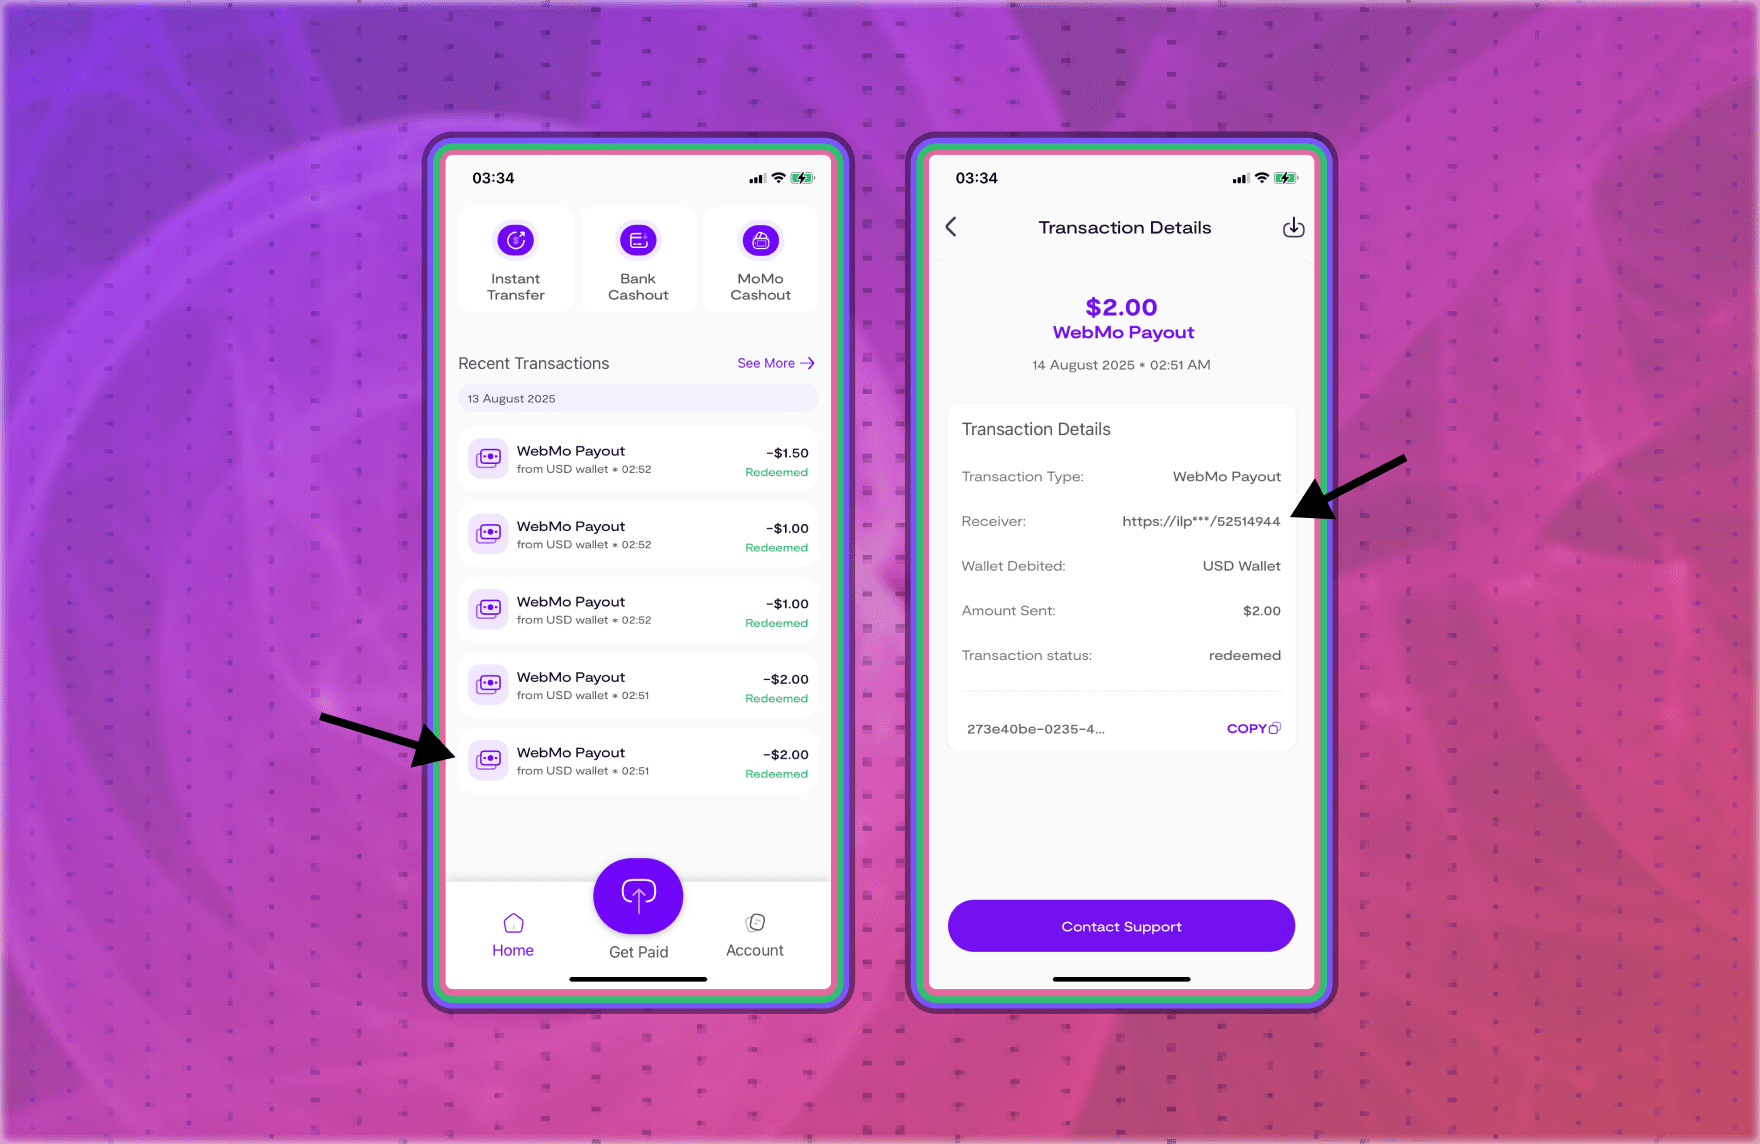
After continuous payments have been streamed via the extension, you can check your Chimoney App wallet to confirm the payouts. You will see ‘Web Mo Payout’ transactions in your transaction history, showing that you have been sending Web Monetization payments.

Payments are automatically paused if:
- You switch tabs,
- You minimize the browser,
- You close the tab,
- Or your budget runs out
To adjust or turn off continuous payments:
- Click the Settings (⚙️) icon in the extension.
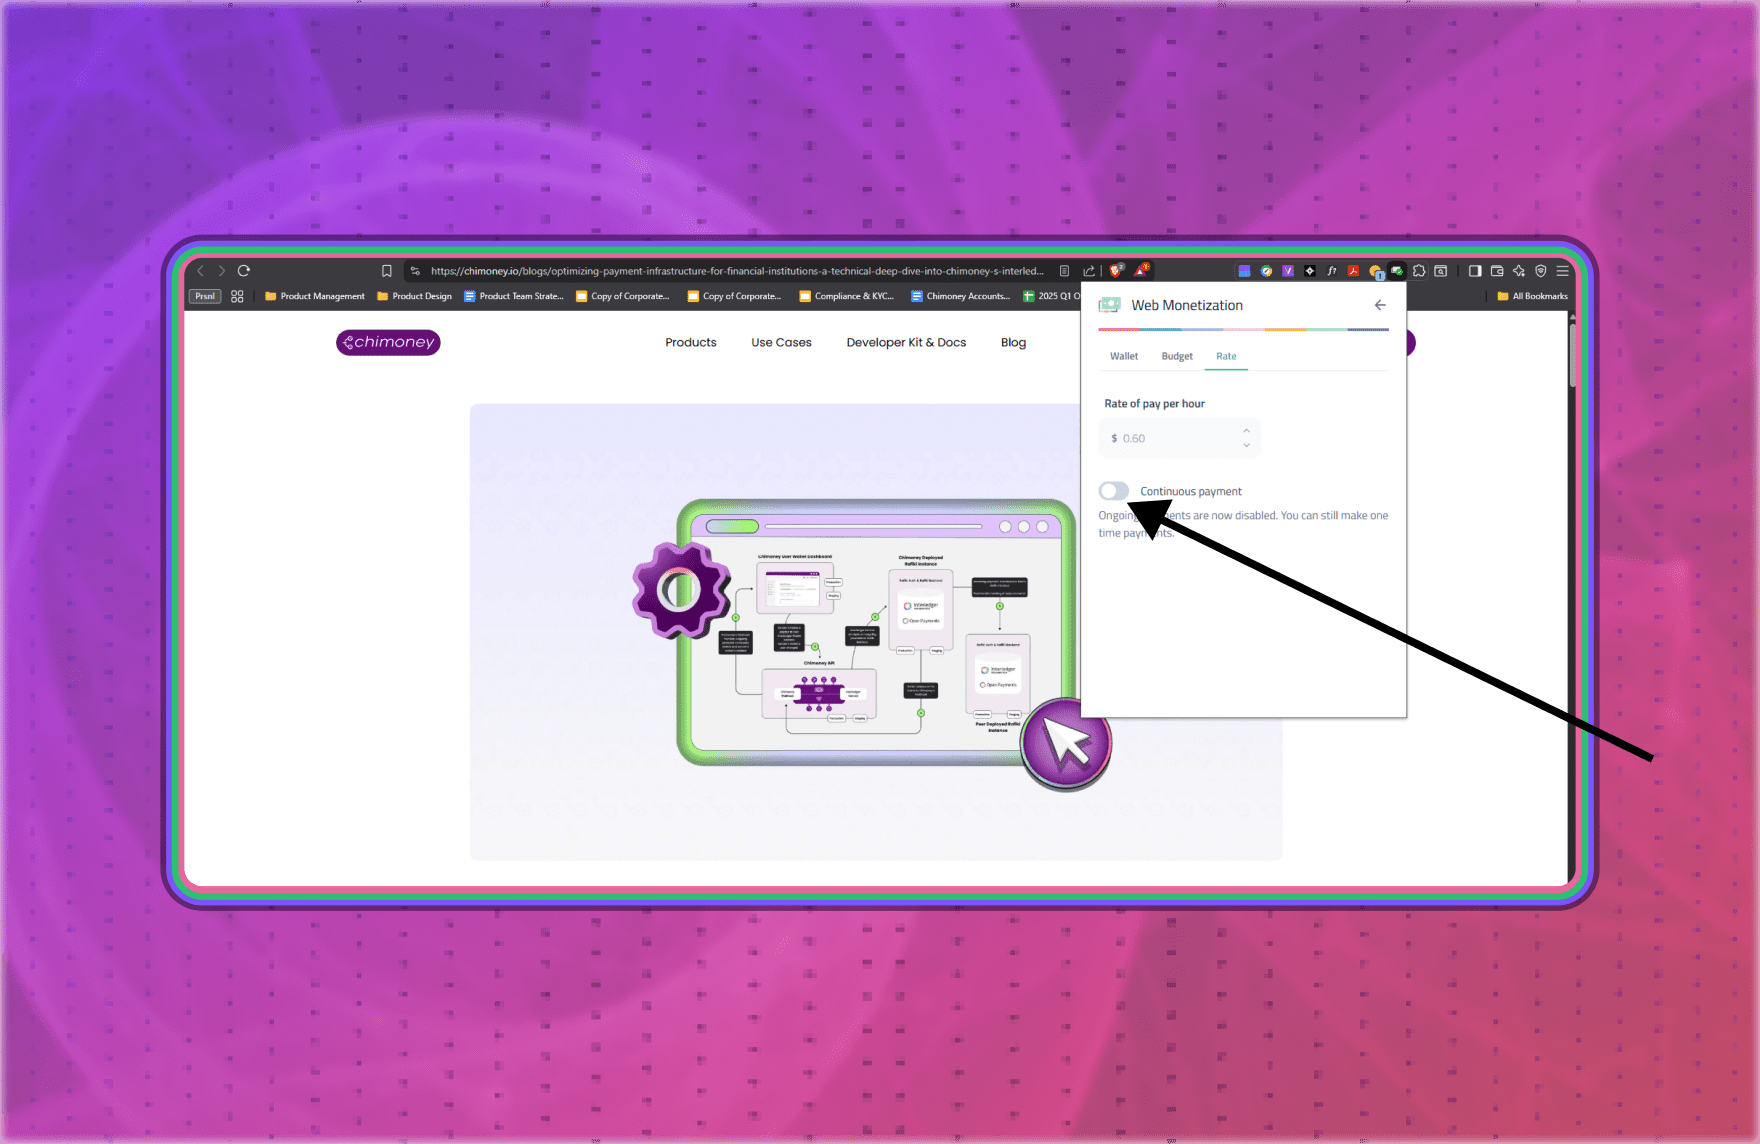
- Navigate to the 'Rate tab'.
- Change the rate or toggle continuous payments off.
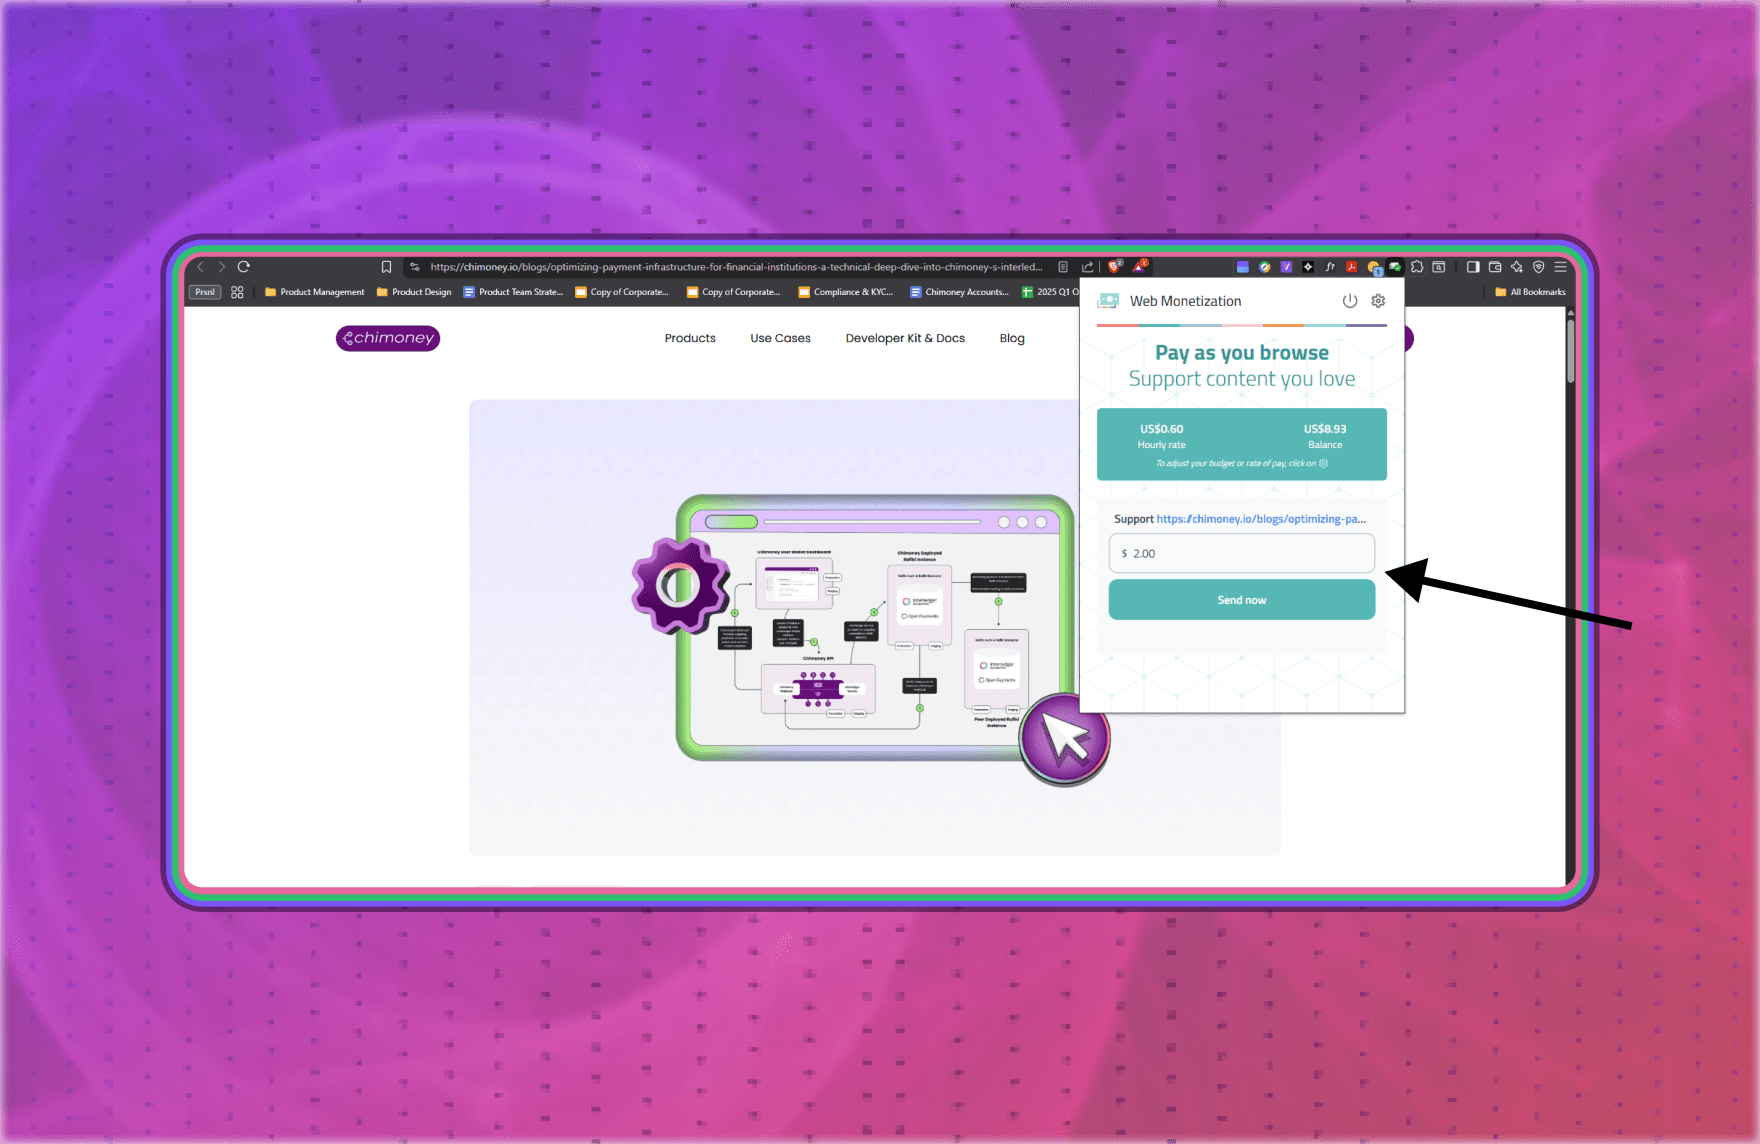
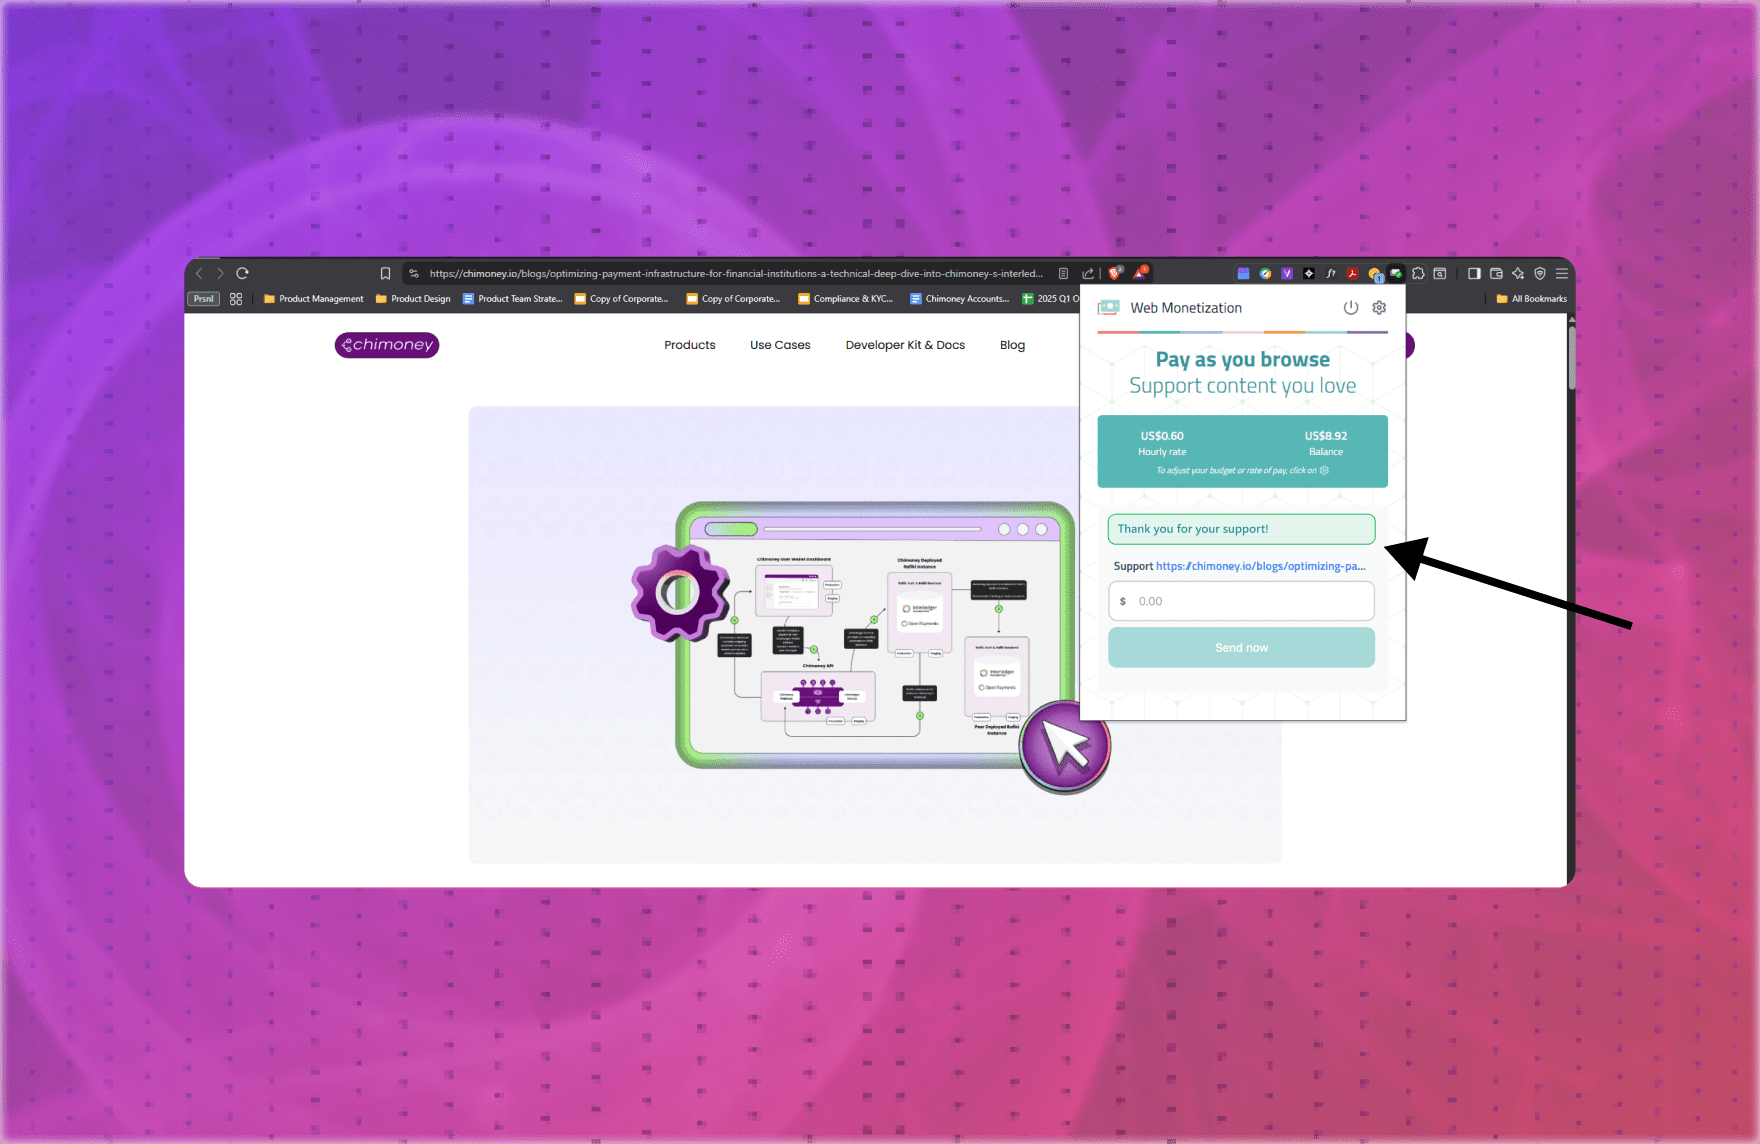
2. One-Time Payments
You can also support creators with specific amounts, as long as those amounts do not exceed your wallet balance.
- Enter the amount you want to send (must be within your set budget).
- Click 'Send Now'.
As shown below, the payment has been successfully sent to the creator’s wallet and the supporter’s wallet has been debited. Also note that the wallet address of the creator is shown in the transaction details.
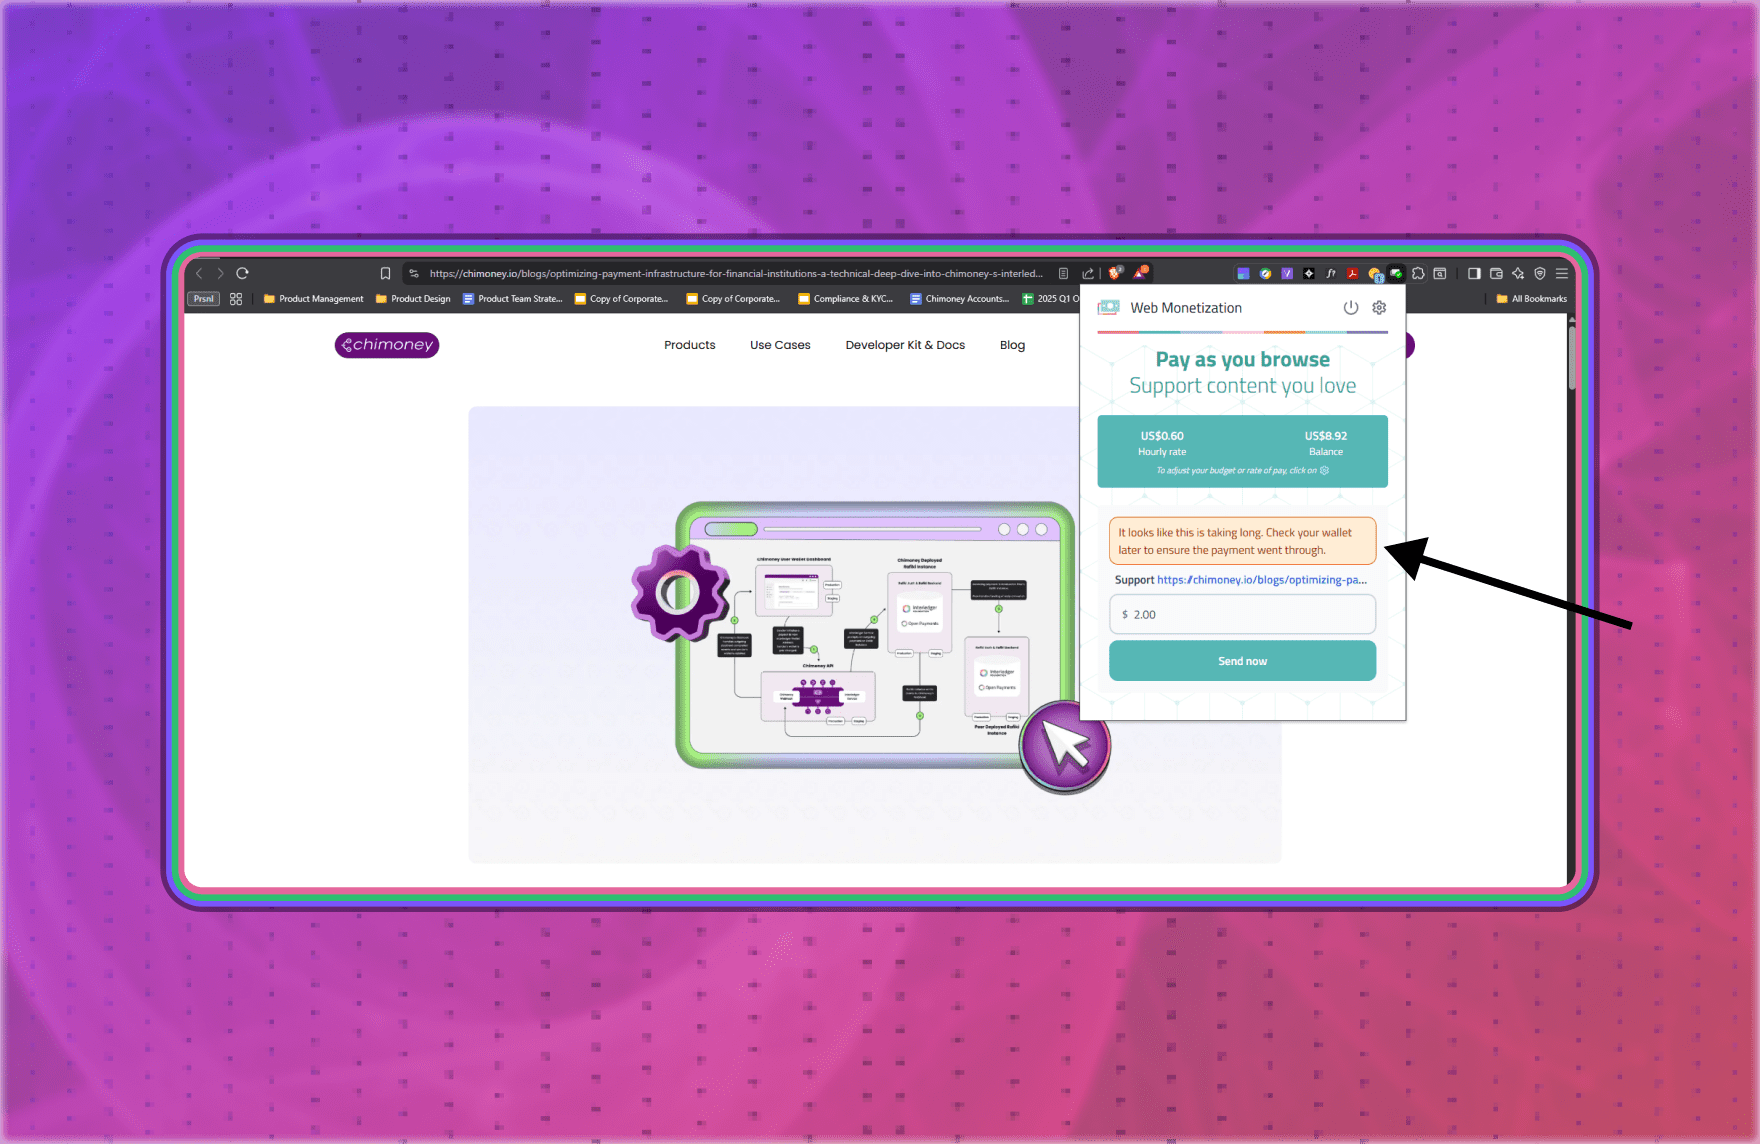
Sometimes, you might see the notification below after making a payment. Don’t worry, simply check your Chimoney App wallet balance and transaction history to confirm the payment.
What Happens After a Supporter Sends a Payment
Once a supporter sends payment to a creator, the money is instantly deposited into the creator’s Chimoney App wallet. The creator will receive:
- An email notification confirming they’ve received a payment.

- ‘Web Mo Deposit’ Transactions in their transaction history, showing that they have received Web Monetization transactions.
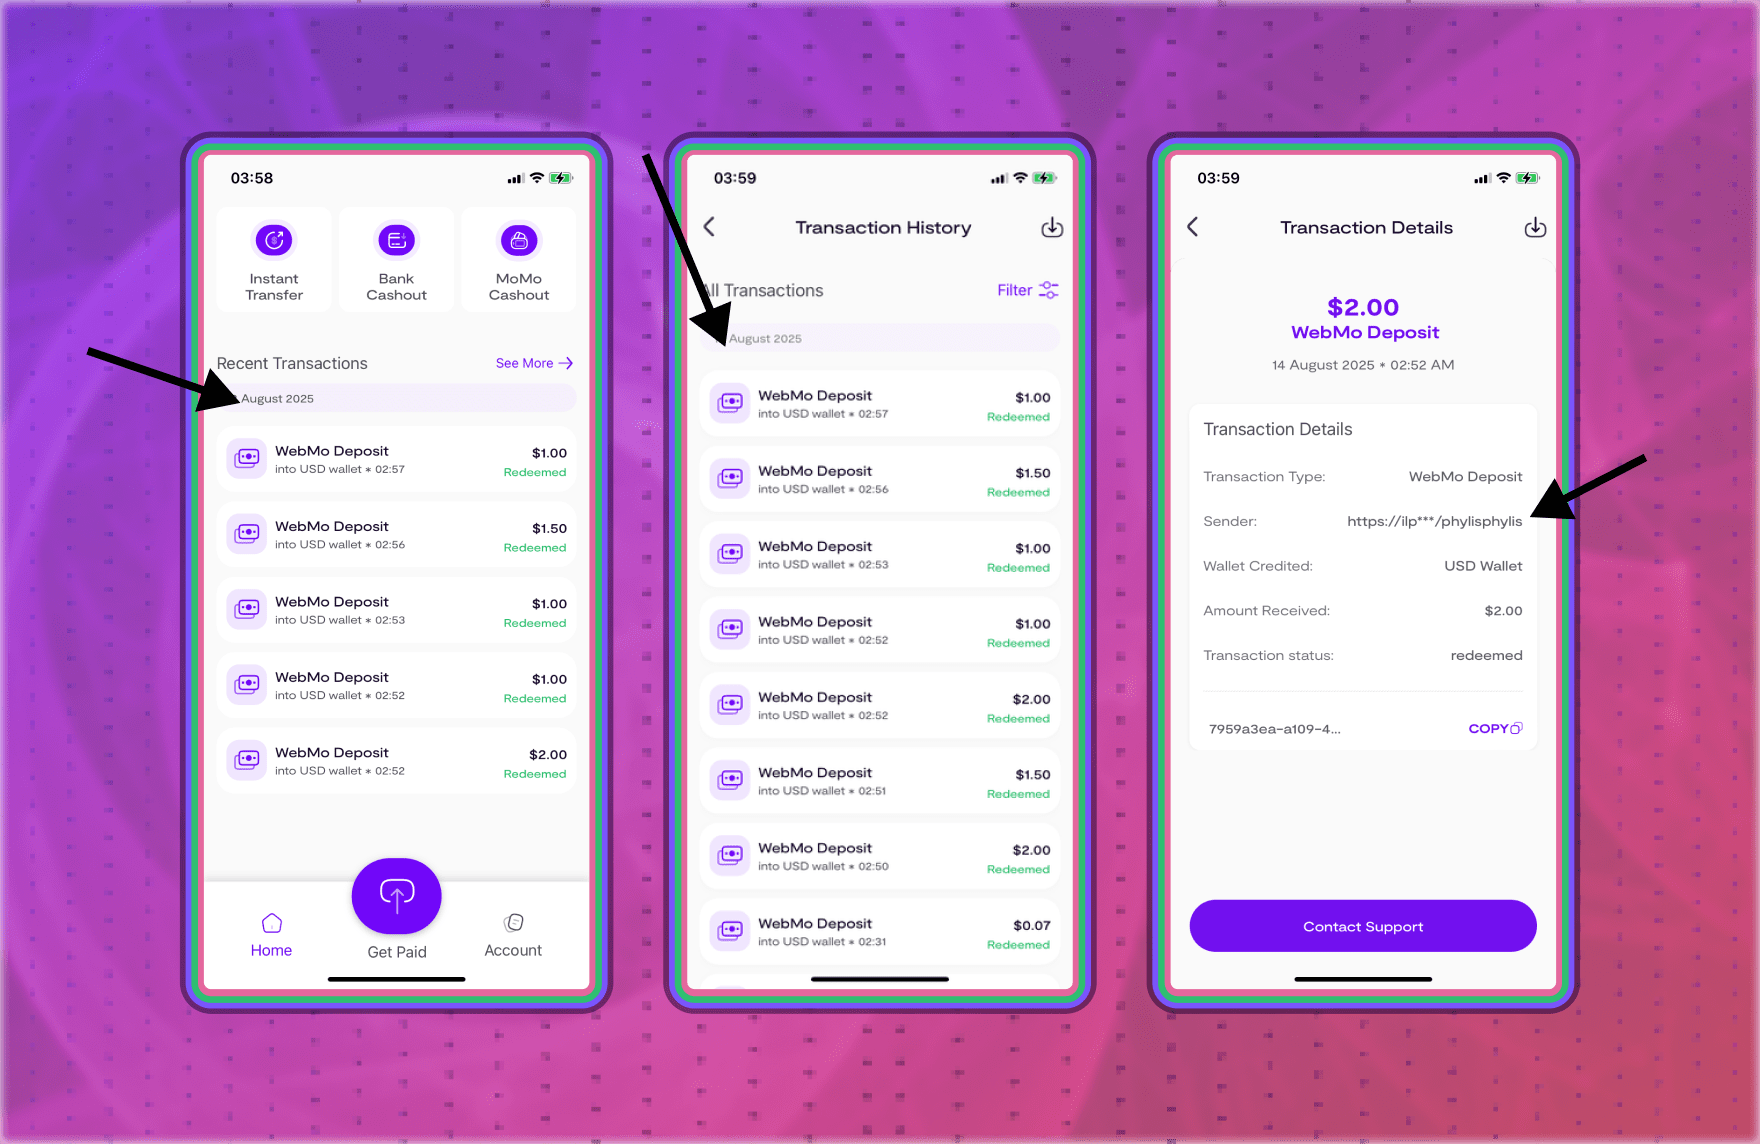
As shown above, for each transaction received, the wallet address of the supporter is attached.
Note: Web monetization payments are anonymous, the creator will not see the supporter’s personal details.
Creators can then withdraw their earnings using any of the following methods:
- Direct Bank Cashout – available in Mexico, Canada, U.S., Nigeria.
- Mobile Money Cashout – available in 14 countries.
- Instant Transfer – SPEI in Mexico, Interac e-Transfer in Canada.
- Send to Email or Phone Number – for flexible cashout options in even more countries.
Need Help?
If you need assistance along the way, visit the Web Monetization Support Page for step-by-step guides and answers to common questions. Our support team is also available through the Chimoney App if you encounter any issues during setup.
Check out these other posts
Why 2025 Is The Year AI Agents Get Their Own Wallets (And Passports)